CenterPoint® Depreciation
- Full Back Up or Full Restore
Related Help
 View or Print as PDF
_24.png) Back Up or Restore a Single User Database
Document
Back Up or Restore a Single User Database
Document
Back Up or Restore File Repository
Back Up or Restore Aatrix History
The Full Backup option combines the CenterPoint database, local user files (preferences, report favorites and logs), file repository, and Aatrix history files backup into a single process, making it easier to capture all required data in one step and share it when needed.
The Full Restore option restores a complete backup including the database, user files/logs, file repository, and Aatrix history from a single backup file. During restore, the system prompts you to place the file repository and Aatrix history files in a designated location and updates preferences to point to the restored files. This helps reduce setup time and ensures files remain accessible without additional configuration.
Full Backup
- Select File > Backup > Full Backup.
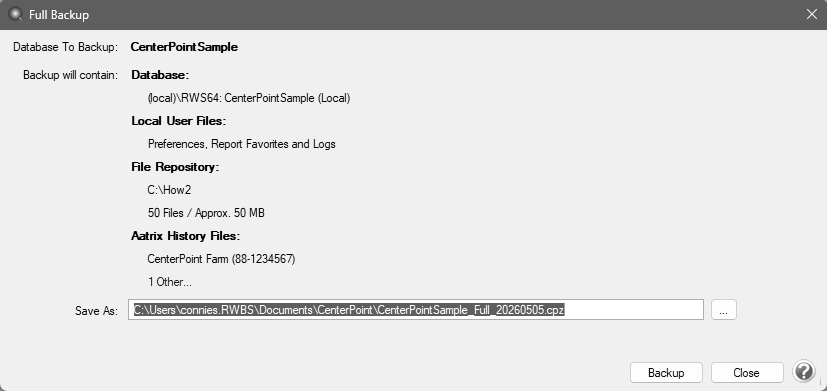
- In the Database To Backup box, select the database that you want to back up. The database that is currently open will automatically display.
- The Backup will contain section lists the following information:
- Database - The name of the selected database to backup and whether it is Local or Remote.
- Local User Files - Indicates that user preferences, report favorites and logs will be included in the backup.
- File Repository - If a file repository is configured, specifies the location, number of files and combined file size.
- Aatrix History Files - Specifies the employer/company in the selected database for which Aatrix history will be backed-up. If there is more than one employer/company with Aatrix history tied to the database, the number of entities is listed with the EIN. Click the Others link to display a read-only list of the entities.
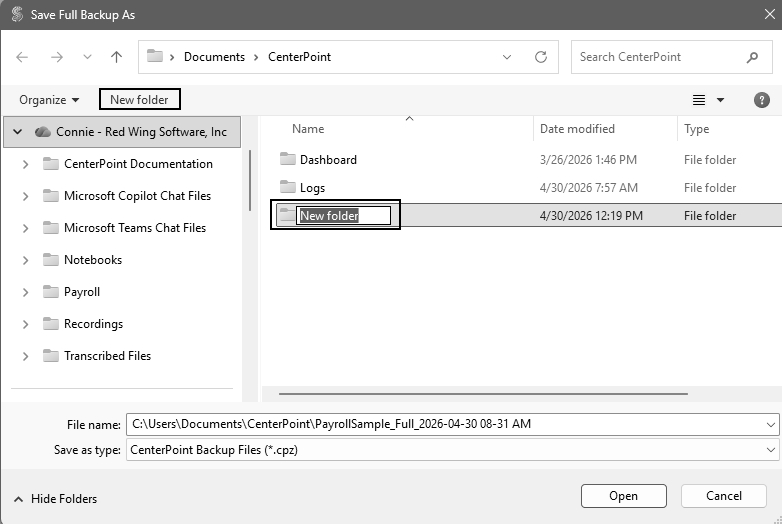
- In the Save As box, a default path displays. Click the ... (Browse) button, select the location on your computer to save the backup file, and then click Save. Once you select the path to back up to, the last path used for backing up will automatically display each time you back up.
Note: If you want to create a new folder to back up to, click New Folder , enter a name for the folder, and then click Open to back up to the new folder.
- To back up to a flash (thumb) drive, select the drive letter that was assigned to the drive when it was inserted into the usb port on the computer.
- To back up to a server or remote computer, select a location on the network drive (for example, f:\ or g:\, etc.).
- Click Backup.
- A progress screen will display. At the Backup Completed Successfully message, click OK.
Full Restore
Use this process to restore a full backup containing the CenterPoint database, user files/logs, file repository and Aatrix history. This process can also be used to restore a CenterPoint database created from File > Backup > Backup Database and/or user files/logs created from File > Backup > Backup User Files. During restore, the system prompts you to place the file repository and Aatrix history files in a designated location and updates preferences to point to the restored files. This helps reduce setup time and ensures files remain accessible without additional configuration.
- Select File > Restore > Full Restore.
- In the Backup File box, select the file you want to restore. Click the ... (Browse) button to locate the backup file . The file name for the full backup file is "databasename_Full_YYYY-MM-DD.cpz."
- The Backup will contain section lists the following information:
- Database - The name of the selected database and whether it is Local or Remote.
- Local User Files - Indicates that user preferences, report favorites and logs are included in the backup.
- File Repository - If a file repository is configured, specifies the location, number of files and combined file size.
- Aatrix History Files - Specifies the employer/company for the Aatrix history in the selected database. If there is more than one employer/company with Aatrix history tied to the database, the number of entities is listed with the EIN. Click the Others link to display a read-only list of the entities.
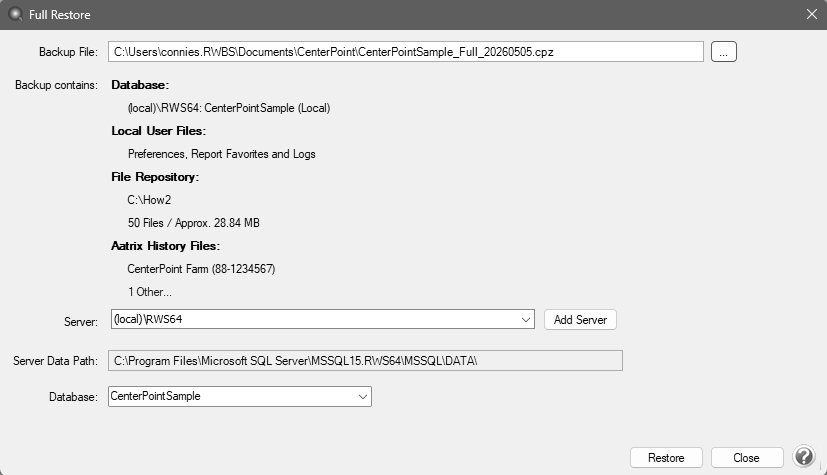
- In the Server box, select the server where your database should be restored. If your database is local, typically, it is recommended that the default local\(RWS)server be accepted in this box.
- In the Server Data Path box, the path that the backup file will be restored to will display.
- In the Database box, the database name that the backup file will be restored to will display.
- Click Restore. The following message displays.

- If the backup being restored includes local user files (preferences, logs, and settings), click Yes. If you do not want to restore local user files, click No.
- If the backup being restored includes a file repository, the Restore File Repository? screen displays. In the Restore to box, the path specified in the Location of File Repository preference in File > Preferences > General > File Attachments displays. This path can be changed to a different location. If the path is changed, the location is also changed in the Location of File Repository preference in File > Preferences > General > File Attachments.
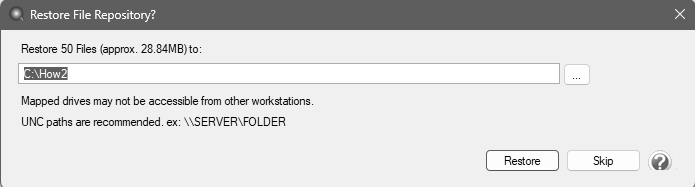
- Click Restore to begin the restoration, or click Skip to skip the file repository restoration.
- If the backup you are restoring includes Aatrix history files, the Restore Aatrix History? screen displays. In the Restore to box, the path specified in the Non-Default File Location preference in File > Preferences > Federal/State Tax Forms > Aatrix File Information displays. This path can be changed to a different location. If the path is changed, the location is also changed in the Non-Default File Location preference in File > Preferences > Federal/State Tax Forms > Aatrix File Information.
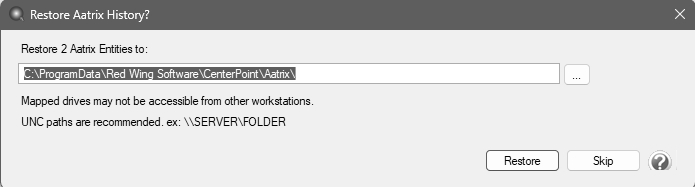
- Click Restore to begin the restoration, or click Skip to skip the Aatrix History File restoration.
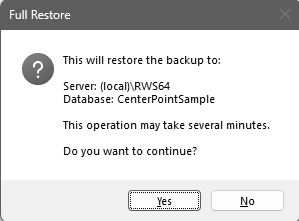
- The Full Restore screen displays confirming the restoration location. Click Yes to continue.
-
If Aatrix History already exists, you will be prompted. Click Yes to overwrite the displayed entity, click No to skip the entity and move to the next (if it exists), or click Cancel to skip all remaining entities.

- At the Full restore completed successfully message, click OK.
- The Full Restore screen will close automatically.
|
Document: 3485 |
|---|