CenterPoint® Payroll
- Form Designers
Related Help
_24.jpg) Form Designer - Open, Add or Resize a Field Video - Duration: 3 min 41 sec
Form Designer - Open, Add or Resize a Field Video - Duration: 3 min 41 sec
Form Designer - Remove or Move a Field Video - Duration: 3 min 02 sec
Form Designer - Change Font or Add Text/Line Fields Video - Duration: 6 min 55 sec
Form Designer - Import a Logo Video - Duration: 4 min 20 sec
Form Designer - Save or Print and Use a Customized Form Video - Duration: 6 min 06 sec
Payroll Check and Stub Forms Designer - Duration: 15 min 10 sec

The form designers allow you to customize invoices, sales orders, checks, and check stubs.If your Product Plan includes the Sales or Purchase Order modules, the Sales/Purchase Order Form Designer is included. If your Product Plan includes CenterPoint Payroll, the Check, Check Stub, and Payroll Check Stub Designers are included.
This document describes how to make several common customizations to an existing invoice using the Invoice Forms Designer. The same processes can be used to make similar changes to checks, check stubs and payroll checks stubs, sales orders or purchase orders using the other forms designers.
Included in this topic is instructions on how to:
Preview and Print a Form Design
Use a Customized Form for Another Database
Open an Existing Form to Edit
We recommend you start creating your custom form by opening an existing form that can be modified and then saved with a different name. System-supplied forms display in blue and cannot be overwritten. Custom forms display before system-supplied forms in alphabetical order.
- Select Setup > Forms Designer > Invoice Form Designer (or one of the other form designers).
- Select File > Open.
Note: When a forms designer is open, there will be two File menus, select the lower File menu.
- Choose the existing form you wish to edit and click Open.
Add a Field
- The Fields list on the upper right side of the screen will list all of the fields that can be added to this form. Find the field you wish to add in the Fields list.
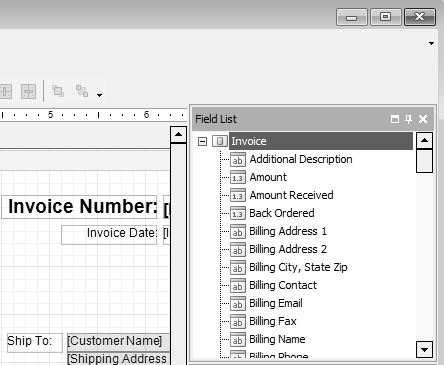
- Then simply drag and drop the field to the desired location on the form.
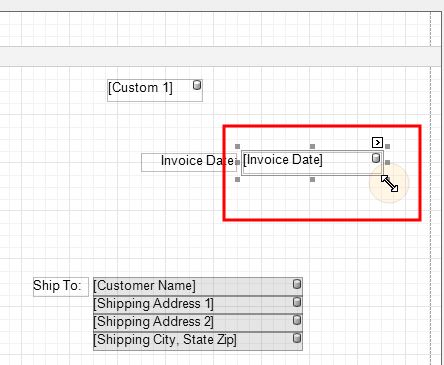
- Press, and hold down, the left button on the mouse, to "grab" the object.
- While continuing to hold down the left button the mouse, "drag" (move) the object to the desired location,
- "Drop" the object by releasing the left button on the mouse.
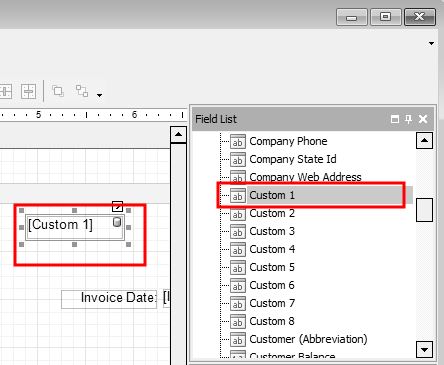
- When the field is selected on the form it will be displayed in a darker rectangle with squares around the rectangle as you see above. The squares at each corner and center points can be used to resize the field. Click on one of the boxes and drag it to change the size of the field.
Resize a Field
- Single click on a field on the form. When the field is selected, it will be displayed with small squares around the rectangle around the selected field. as you see below.
- Click on one of the boxes and drag it to change the size of the field. The same process can be used to resize lines, pictures, text fields, etc.
Remove a Field
- Single click on the field you wish to remove from the form.
- Press the Delete key on your keyboard.
Move a Field
- Click on the field you wish to move.
- Drag-and-drop the field to the desired location.
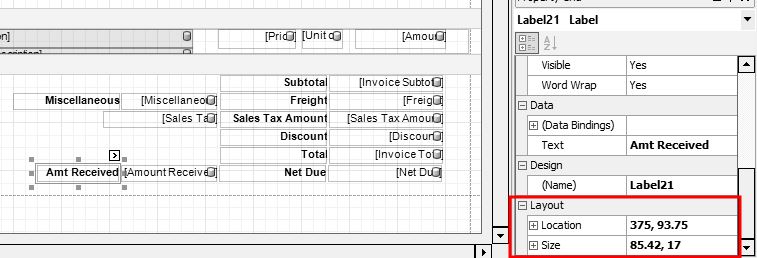
- You can fine tune the location and size by adjusting the Layout settings on the right.
Change the Font
- Click on the field you wish to change to select it.
- To the right, the font and size are displayed in the Appearance section. Click in the font field to display the lookup button, click
 .
.
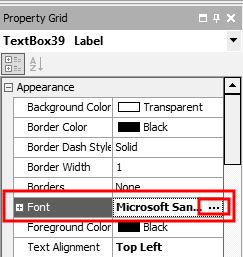
- The Font screen will display. Select your desired Font, Style, and Size. Click OK.

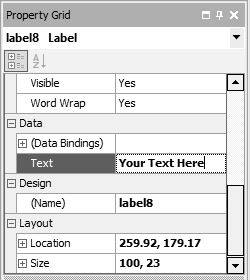
Add a Text Field (Label)
- Click on the
 button in the toolbar. Your cursor will change to a + .
 - Click in the form to specify where you want the text located and drag to the size needed.
- With the field selected, change the text in the Data section to the right.
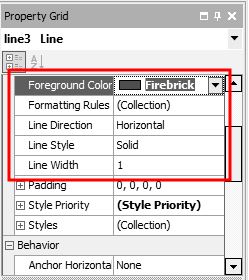
Add a Line
- Click on the
 button in the toolbar.
 - Click in the form where the line should be located and drag to draw a line.
- Drag-and-drop to move the line to your desired location.
- To the right, the Foreground Color, Line Direction, Line Style, and Line Width of the line are displayed in the Appearance section. Click in any field and click the drop-down arrow to change the selection.
Import a Logo
Prior to adding your logo to the form itself, you must import the logo into the
- Select Setup >
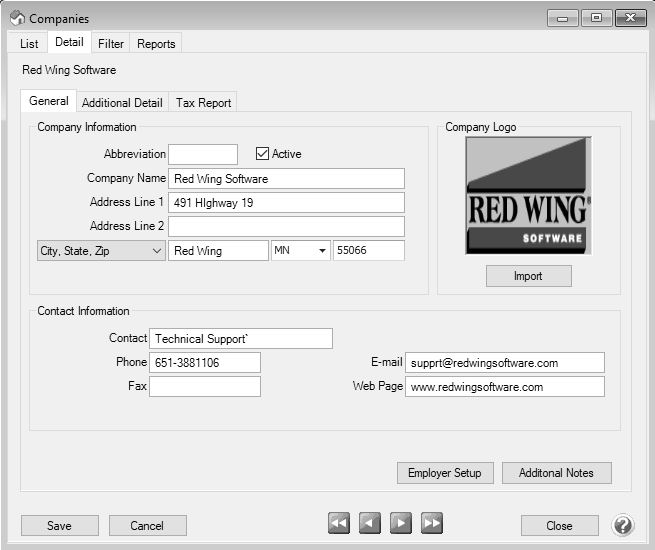
- Click on the Import button. Browse to the image file for you logo. Click Open.
- Click Save.
- The logo is then added to the form using the form designer. Follow the Add a Field instructions to add the
Add an Image to a Form
Images can be added to a form by dragging and dropping any image file to your form.
- Open File Explorer.
- Navigate to the folder containing the image you want to add to your form.
- Select the image file and drag and drop to the form designer.

Add a Page Number to a Form
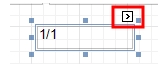
- Click on the on the toolbar
 button in the toolbar.
 - Click in the form where the page number should be located and drag to draw a box to add the page number field.
- To modify the way the page number displays:
- Click the carat (the page number box must be selected for the carat to display):
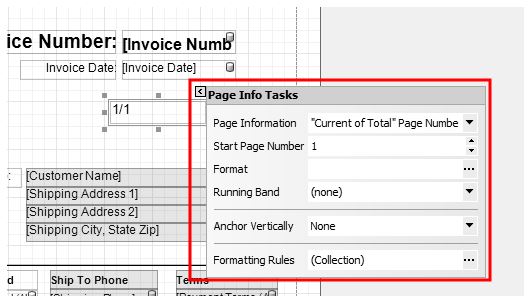
- Page Information - Allows you to determine if the page number should be roman numeral lowercase or uppercase, display as the user name, current date and time, page count, or page number with the total number of pages.
- Start Page Number - Allows you to specify the page number you wish to display first.
- Format - If you selected Current Date and Time, click
, under Category select DateTime, and then on the Standard Types tab, select the format of the date time, for example MM/dd/yy, MM/dd/yyy, etc.
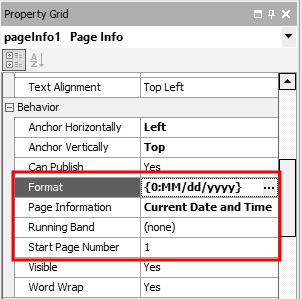
- Or, to the right, the Page Information, Start Page Number, and Format are displayed in the Behavior section.
Formatting Forms
- To align a field to the left, select the field and select Format > Justify > Left . A field can also be aligned to the center, right, or justified by selecting Format > Justify > Center, Rights, or Justify .
- To align multiple fields horizontally to the left, select all of the fields by holding the CTRL key down while making the selections, and then clicking the Lefts icon
 . Fields can also be aligned horizontally to the center or right by selecting the fields and clicking the Centers or Rights icon
- To align multiple fields vertically to the top, select all of the fields by holding the CTRL key down while making the selections, and then clicking the Tops icon
 . Fields can also be aligned vertically to the center or bottom by selecting the fields and clicking the Middles or Bottoms icon
  .
. - To make multiple fields the same width, select the fields and click the tWidths icon
 . Fields can also be made the same height or size by clicking the Height or Both icons
  .
.
Keyboard Shortcuts
| Shortcut Key(s) | Action |
|---|---|
| Ctrl + Y | Redo last undo |
| Delete | Delete selection |
| Up Arrow | Move selection up |
| Down Arrow | Move selection down |
| Left Arrow | Move selection left |
| Right Arrow | Move selection right |
| Shift + Up Arrow | Move selection bottom border up (shrinking it) |
| Shift + Down Arrow | Move selection bottom border down (growing it) |
| Shift + Left Arrow | Move selection right border left (shrinking it) |
| Shift + Right Arrow | Move selection right border right (growing it) |
| Shift + Drag | Maintains the aspect ratio while resizing |
| Ctrl + Drag | Clone the selection |
| Ctrl + Click | (Un)Select multiple items |
| F4 | Switch to designer |
| F5 | Switch to preview |
| Ctrl + O | Open a form |
| Ctrl + S | Save the form |
| Ctrl + + | Zoom in |
| Ctrl + - | Zoom out |
| Tab | Tab between items on the form |
Preview and Print a Form Design
To Preview the form, select View > Preview . An example of the form will display applied to the layout specified in File > Preferences > Printing > Customer Invoices(or the form you are designing, for example Checks, Sales Orders, Purchase Orders, etc.). CenterPoint will generate some random content
on the form so you can determine if the information on the form is accurate. This content is not from your database. You can print the preview by clicking the Print icon  . To return to the designer, select View > Designer.
Save a Customized Form
- Once your desired changes have been made, select File > Save As... within the Form Designer.
- Specify a Name for your customized form.
Note: You cannot overwrite the system supplied forms.
- Click Save.
Use a Customized Form in Another Database
- Open the Forms Designer in the database with the custom form.
- Select File > Open and select the customized form.
- Select File > Save File As...
Note: You must select Save File As... option, not the Save As option.
- Browse to a location to save the file, such as your Desktop. Note where you are saving the file to, as you'll need to find the file later. Click Save.
- Open the Forms Designer in the database you wish to add the custom form to. Select File > Open File.
- Browse to the location used in Step 2 and select the custom form file. Click Open.
- Select File > Save As... to save the custom form in the new database.
Using a Customized Form to Print
To begin using a customized form:
Customer Invoices
- Select Processes > Sales > Customer Invoices.
- Enter the invoice as you normally would. On the Select tab, click the Printer button. Then select the custom form from the drop down box. Continue entering the invoice as you normally would.
- If you'd like the system to default to this form (instead of having to select it manually each time), then your form preference should be updated.
- Select File > Preferences > Printing > Customer Invoices or Customer Invoices (Detail)
- Select the Database tab and in the Select Form Type field, select your custom form.
- Click Save.
Accounts Payable Checks/Stubs
- Select Processes > Purchases > Pay Invoices Due.
- Select the invoices for payment as you normally would. Click the Printer button. Then in the Check Type or Stub Type fields, select the custom forms from the drop down box. Continue printing the checks as you normally would.
- If you'd like the system to default to these forms (instead of having to select it manually each time), then your form preference should be updated.
- Select File > Preferences > Printing > Checks.
- Select the Database tab and in the Select Check Type and/or Select Stub Type field, select your custom form.
- Click Save.
Payroll Check/Stub
- Select Processes > Pay Employees.
- Process payroll as you normally would.
- When you print checks, in the Check Type and/or Stub Type fields, select your custom form.
- If you'd like the system to default to these forms (instead of having to select it manually each time), then your form preference should be updated.
- Select File > Preferences > Printing > Payroll Checks or Payroll Advices.
- Select the Database tab and in the Select Check/Advice Type or Select Stub Type field, select your custom form.
- Click Save.
Information Specific to the Payroll Check/Stub Designer
Check Settings
To set the layout of your check form, open a form and then select File > Form Settings.
Select one of the following layouts:
- Check/Stub/Stub
- Stub/Check/Stub
- Check/Detail
- Stub/Stub/Check
- Stub/Check/Address
- Detail/Check
Check Stub Settings
To set the number of lines that will print on a check stub before an overflow sheet is generated, select File > Form Settings.
Under Max Lines Before Overflow, select the number of lines for the Small Stub (used when multiple check stubs are on a form) or Large Stub (used when one check stub is on a form).
You can also set the way the detail will be summarized on the Check Stub Settings screen under Summarizeby. By default, the detail is summarized by Earning and Rate which means that you will see one line for each unique combination of earning and rate on a check. Selecting other options will break-down the stub detail further, for example; you may want to see a break-down by the departments the employee worked in. Note: When YTD amounts are calculated for the stub, Rate is not included in the break-down, even if it is selected on this screen. This is because over time Rate could fluctuate depending on the earning, i.e. Commission. Breaking down YTD by Rate could quickly result in much detail being printed on the stub which could be the result in more frequent use of overflow sheets.
Under Other, clear the Include Year-To-Date Earning Detail check box to remove year-to-date earning payment detail information from the check stub. If you use a number of different earnings over the course of a ear, this may reduce/eliminate overflow sheets. Note: This does not affect year-to-date earning totals.
Data Fields
- Direct Deposit Amount - If you intend to use a custom stub for direct deposit advices, you will need to include the Direct Deposit Amount fields on the custom stub. These fields will not print on checks, but will print on Direct Deposit Advices.
- Earning Work Date (Time Sheet) - If you want to include the date an employee worked on the pay period stub line, include the Earning Work Date (Time Sheet) field in your check stub form design. This Data Field represents the date for which a time sheet associated with an earning on the stub was entered. If the earning isn’t the result of a time sheet, the work date will not print on the stub. If you want to include the Earning Work Date (Timesheet) field on the check stub, you also need to select the Work Date (Timesheet) under Summarize by in Setup > Forms Design > Check Stub Form Designer > File > Settings so that the earnings are printed by work date. Only current earnings will display work date information, year-to-date information will not be summarized in this way. Year-to-date values will be displayed for each unique combination of summary fields excluding Work Date, in this example, Earning and Rate.
- Memo Line - If you want to include the Memo Line text entered in Pay Employees on your employees' pay stub, you must include the Memo Line data field on your selected check stub.
- Average Hourly Rate - The check stub designer includes two selections for Average Hourly Rate, one under Data Fields and one under Bilingual Labels. The Average Hourly Rate data field contains the sum of all current earning Amounts divided by the sum of all current earning Hours Worked.
Information Specific to the Check/Stub Form Designer
Check Settings
To set the layout of your check form, open a form and then select File > Form Settings.
Select one of the following layouts:
- Check/Stub/Stub
- Stub/Check/Stub
- Check/Detail
- Stub/Stub/Check
- Stub/Check/Address
- Detail/Check
Check Stub Settings
To set the number of lines that will print on a check stub before an overflow sheet is generated, open a form and then select File > Settings.
Under Max Lines Before Overflow, select the number of lines for the Small Stub (used when multiple check stubs are on a form) or Large Stub (used when one check stub is on a form).
Under Format, in the Summarize box, select No if you are using the Standard (Detail) check stub or any check stub you've saved as a custom check stub from the Standard (Detail) check stub and you want to include all check stub detail or select Yesif you are using the Standard (Summary) check stub or any check stub you've saved as a custom check stub from the Standard (Summary) check stub and you want to summarize the check stub detail to show only one line per invoice.
Data Fields
- The Quantity 1/2, UOM 1/2 (Abbreviation), UOM 1/2 selections can be used on detail check stubs or on single line summary stubs.
|
Document: 3180 |
|---|