CenterPoint® Fund Accounting
- Transaction Search
Related Help
_24.jpg) Using Transaction Search Video - Duration: 6 min 32 sec
Using Transaction Search Video - Duration: 6 min 32 sec
More About Transaction Search Video - Duration: 12 min 29 sec

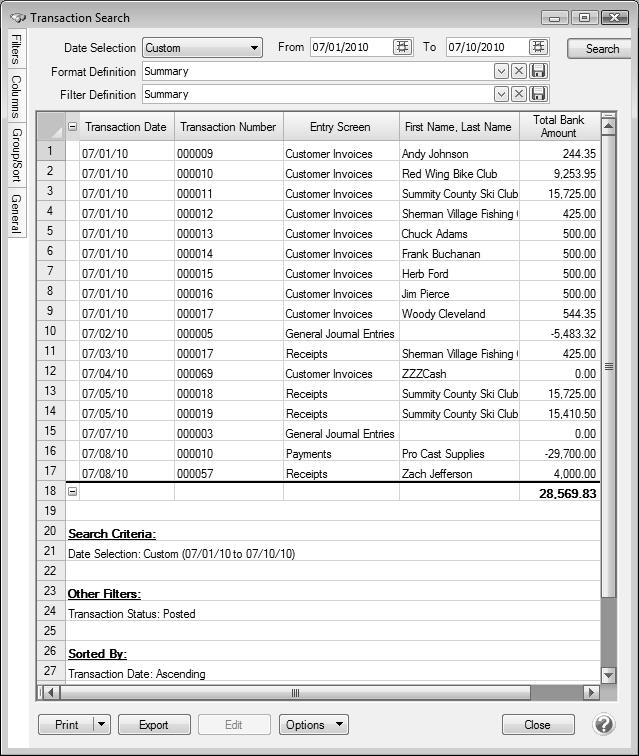
Transaction Search is a tool that allows you to review, edit, delete and report transactions and balances. Here's an example of a few specific things that you can do with search:
- Search for a specific transaction or transactions.
- Edit a transaction.
- Void or Delete a transaction.
- Reprint a check or invoice.
- Create formats that produce reports on financial activity
Transaction Search screen is similar to the report preview screen in that it has a Filters, Column, Group/Sort and General tabs that allow you to modify the information included. The difference being that the transaction search gives you many more choices of data (columns) & level of details to include. In this topic we'll show you the general steps one would use to execute a search. Please refer to the Edit or Delete a Transaction and Reprint a Check, Invoice or Deposit Slip topics for specific instructions on how to use transaction search for those types of processes. Once the data is displayed in the transaction search it can be edited, deleted or printed.
Using Transaction Search
- Select Processes > Transaction Search or Reporting Tools > Transaction Search
- In the Date Selection or date From/To fields, specify the appropriate date range to search. By default, the Date Selection criteria is set to This Month. To set your selection to display each time you start Transaction Search, right-click and select Set As Default.
- The Format Definition allows you to choose a predefined format for the level of detail, columns displayed, the order of the columns, and the group and sort order of the search results. The list includes built-in format definitions, but you can also create your own. For a basic search, we recommend you use Summary which is one line of data per transaction.
- The Filter Definition allows you to choose predefined data selections on the Filters tab. The default, Summary, is recommended as it includes all posted transactions.
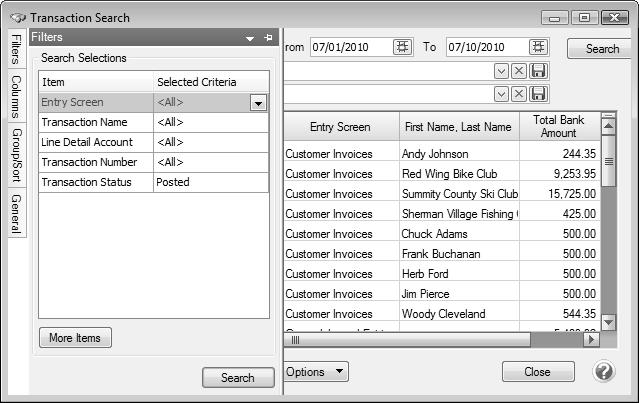
- Select the Filters tab to choose the data that should be included in this search. For example, if you only want to see Receipt transactions, that can be selected in the Entry Screen field, or if you only want to see transactions for a specific account, choose that account in the Line Detail Account field. If the field you'd like to select data by is not displayed as a Search Selections Item, click on the More Items button to display additional fields. If you'd like to save these selection criteria for future use (for example, you'll want this same search next month), select the Search button and then click on the Save
 icon next to the Filter Definition field. The save process will prompt you to name this new Filter Definition for future use.
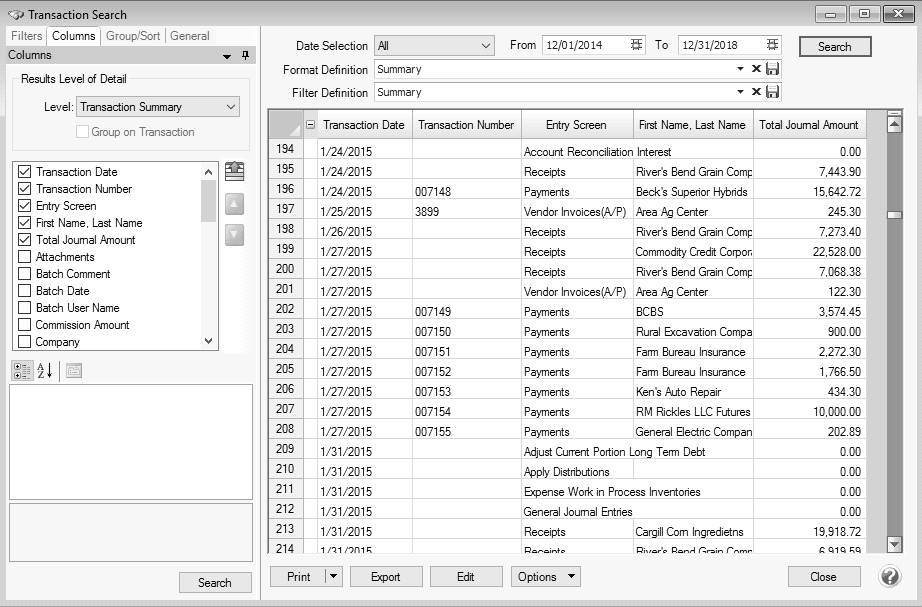
- Select the Columns tab to:
- Select the Level field allows you to select the level of detail that will display in the search result, Transaction Summary, Transaction Lines, Journal Entry Summary, and Journal Entry Details.
- Define which columns to include in the search results and determine the order they will display. Place a check mark in each field that you'd like displayed as a column of data within the search. Use the arrow up and down buttons to decide which order the columns will be displayed in. icon next to the Format Definition field. The save process will prompt you to name this new Format Definition for future use.
- Select the Level field allows you to select the level of detail that will display in the search result, Transaction Summary, Transaction Lines, Journal Entry Summary, and Journal Entry Details.
- Select the Groups/Sort tab to define how the data will be sorted and subtotaled.
-
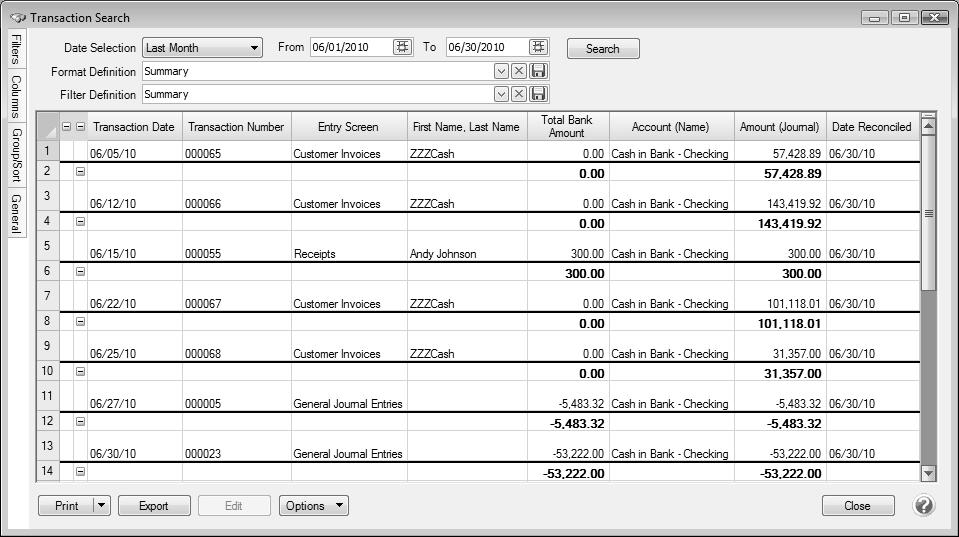
- Click Search to update the search screen with the details provided in the various tabs.
- Once the data is displayed in the transaction search screen it can be reviewed, sorted ascending/descending by clicking the column headings, edited, deleted or printed. To edit or delete a transaction simply double-click on the appropriate row. To print the information select Print. Additional information can be displayed for transactions by highlighting the transaction and then right-clicking to display a context menu. The information on the context menu will change based on the transaction type, for example, for AP or AR invoices and Credit Card Purchases, the menu will display a View Payment History option, for Sales Orders or Purchase Orders the menu will contain a View Sales Order or Purchase Order option, for AR invoices, the menu will display Preview Invoices, and for AP Payments,AR Receipts, or Credit Card Payments the menu will contain a View Invoices option.
Frequently Asked Questions
Q: I have created a Format Definition that I'd like to also use in another database. Do I have to set it all up again in that database?
A: No, you can use the Export Format Definitions option. To export a format definition so it can be used in another database, click the down arrow on the Options button on the bottom of the Transactions Search screen, select Export Format Definitions, select a name and location for the export file, select the format definitions to be included in the file, and then click OK. Click OK. Options > Import Format Definitions can be used in the other database to bring in the format definition.
Q: How do I display just the transactions for one account?
A: Select the appropriate Date range on the main transaction search screen. Then click on the Filters tab. In the Line Account Detail field, select the appropriate account. Click Search.
Q: How can I see all of the transactions for the month, grouped by Account?
A: We'll use a number of the tabs to modify the results:
- Select the appropriate Date range on the main transaction search screen.
- Click on the Columns tab. Change the Level field to Journal Entry Summary (this is done so the results include the account). Select the appropriate Account fields (for example, account name or number).
- Then click on the Group/Sort tab. Put a check mark in the Group box next to the account field that was added in step 2. Click Search.

Q: I have a transaction that is missing from bank reconciliation. Is there a way in Transaction Search to see if it's already been reconciled, and if it has, what date?
A: Yes, we can display the transactions with a Date Reconciled.
- Select the appropriate Date range on the main transaction search screen.
- Click on the Columns tab. Change the Level field to Journal Entry Summary. Put a check mark in Group on Transaction. Select the fields shown below:
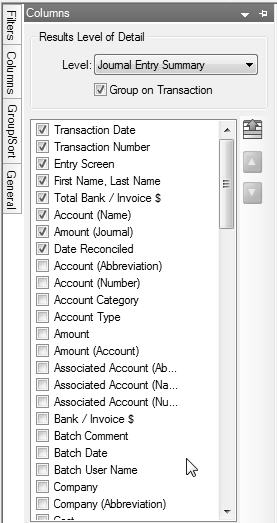
- Click on the Filters tab. In the Line Account Detail field, select the appropriate bank account.
Note: if you also know who the missing transaction was written to, you can also select that in the Transaction Name field.
- Click Search. If you would like to use these selections again in the future, click on the save icon next to the Format Definition field. The save process will prompt you to name this new Format Definition for future use (for example, Transactions with Date Reconciled).
Q: I made the appropriate selections in the Filter, Columns and Group/Sort tab, but the transactions displayed in my main Transaction Search screen didn't change?
A: This will happen if the Search button is not clicked on after making your selections in the tabs. Click on the Search button at the top of the screen to refresh the data using the new criteria.
|
Document: 3121 |
|---|