CenterPoint® Accounting for Agriculture
- Setup and Processing Finance Charges

Related Help
_24.jpg) Finance Charges Video - Duration: 13 min 04 sec
Finance Charges Video - Duration: 13 min 04 sec
 View or Print as PDF forCenterPoint Accounting for Agriculture
View or Print as PDF for CenterPoint Accounting
| Document #: | 3148 | Product: | CenterPoint® Accounting |
|---|
Use this optional feature to set up and process finance charges on past due customer balances. If a customer's balance is not paid when due, the finance charge information is used to calculate their finance charge amount which is then added to their balance. This occurs when you select Processes > Sales > Calculate Finance Charges. You can easily set up multiple finance charge codes for use with different customers.
Step A: Create a Finance Charge Rule
Step B: Assign Finance Charge to the Customer
Step C: Calculate Finance Charges
Step D: Reverse a Previously Calculated Finance Charge
Option 1: Reverse Individual Finance Charge Invoices through Transaction Search
Step A: Create a Finance Charge:
- Select Setup > Sales> Finance Charges. Click New to create a new finance charge rule.
- In the Abbreviation box, enter up to ten characters of optional information that you can easily identify the finance charge by.
- In the Name box, enter up to 30 characters of required information that describes the finance charge.
- In the Account box, enter the default income account to which you want the finance charges applied when they are calculated and posted to the general ledger (generally, to a Revenue or Other Revenue account). Finance charges will be credited to this account.
- In the Annual Percentage rate box, enter the annual finance charge rate to use for this code. Enter any percentage from zero (0) to 99.99. For example, enter 18 for 18%.
- In the Minimum Charge box, enter the minimum amount you charge on past due accounts. When finance charges are calculated, the minimum charge is used if it is larger than the calculated finance charge. For example, if the calculated finance charge is $4.20 and the minimum charge is $5.00, the finance charge on the past due account will be the $5.00 minimum charge not the $4.20 calculated finance charge. If you do not use a minimum charge, leave this box blank (any calculated finance charge will be added to the balance even if it is only a penny).
- In the Grace Period box, enter the number of days after the due date before you charge finance charges. For example, if your due date is October 15th, you might set up a grace period of 5 days to allow for customers who are just getting their payments in the mail on the 15th. If it's paid within the grace period it will not be charged finance charges.
- Select the Compounded (calculate finance charges on previous finance charges) check box to calculate finance chargers on previous finance charges once they become past due. Laws vary by state on whether this is allowed or not, so be sure to check with your accountant or an authority in state government.
Step B: Assign Finance Charge to Customers
- Select Setup > Customers.
- Select a customer that should be charged finance charges in the event of past due invoices and click Edit.
- Click on the Accounting tab. At the bottom of the screen, specify the appropriate Finance Charge for this customer.
- Click Save. Repeat these steps for each customer that should be charged finance charges in the event their invoices become past due.
Step C: Calculate Finance Charges
Finance charges are calculated only for those customers set up as subject to finance charges on the Setup > Customers > Accounting tab. The calculation uses the code in the Finance Charge box on the Accounting tab and takes the minimum charge, annual rate, grace period, etc. from the specified finance charge code.
The calculation formula for finance charges is: Past Due Amount * (((Annual Rate/100/365) * Days Past Due). (The Past Due Amount includes the Net Due for each invoice. If the Net Due is less than or equal to zero the calculation is not performed on the invoice and if it is greater than zero the invoice is included in the invoices to calculate finance charges on).
- Select Processes > Sales > Calculate Finance Charges.
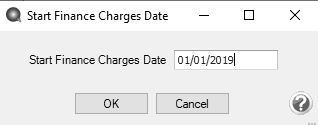
- Click the Modify Start Date button to set the initial starting date you want to begin calculating finance charges. Enter the date and then click OK.
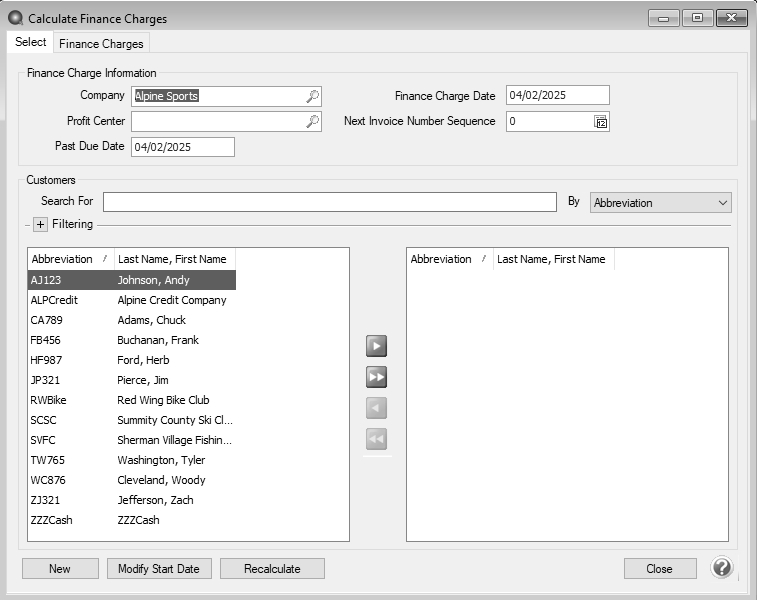
- In the Company/Fund box, select the company/fund that you want to calculate finance charges for. If there is only one company/fund in your database, the company will already be selected by default.
- If you want your finance charges to calculate and post to a specific profit center, select the appropriate Profit Center.
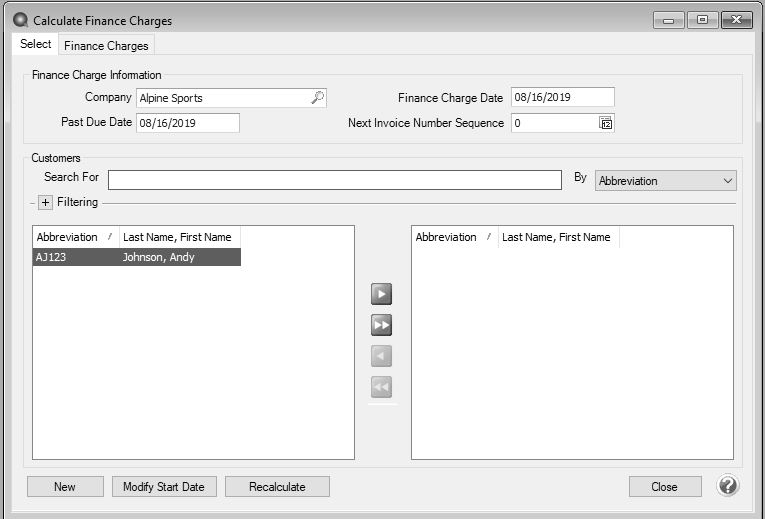
- In the Past Due box, specify the date that charges are past due and subject to the finance charge calculation rules. This is normally the last day of the month that you are calculating finance charges for. This date is compared to the due date to determine if a charge is past due (subject to finance charges) or not.
- In the Finance Charge Date box, specify the date that the finance charge invoices created by this process should be dated. This is normally the same date specified in the Past Due box.
- In the Next Invoice Number Sequence box, the next available sequence number in the Calculate Finance Charges sequence will display. This will be the first transaction number assigned. If you need to change the sequence number, enter the new number. If you need to change the next available sequence number, right-click, select Edit, select the Detail tab, and then enter the next available sequence number, for example you may want to identify the finance charge sequence number with FC in front of the number. For more information about numbering sequences, see the Maintaining Check and Invoice Numbers topic.
- Move the customers you want to calculate finance charges for from the left list to the right list. If you click the double-right arrow, all customers will be selected for calculation. Normally one will move all customers to the right. Those customers that don't have past due invoices or not setup to calculate finance charges, will be ignored in the calculation process.
- Click New.
- Click Create.
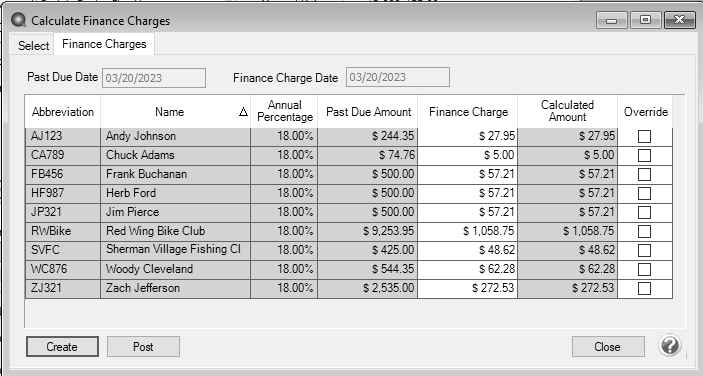
- Verify the calculated Finance Charge in the Calculated Finance Charges grid. If you want to change the amount, enter the amount that should be charged in the Finance Charge field. The Override check box will automatically be selected.
If a calculated finance charge is overridden and changed to 0.00, a finance charge transaction will not be created when finance charges are posted.
- Once all calculated finance charges are accurate, click Post to complete the process and update the customers balances with the additional finance charges.
Step D: Reverse a Previously Calculated Finance Charge
Option 1: Reverse Individual Finance Charge Invoices through Transaction Search
When finance charges are posted, an invoice is created for each customer that was charged finance charges. The invoice will be dated as the Past Due Date you set in Step C-4. As with all other transactions in the system, if needed, the finance charge invoices can easily be removed or modified.
- Select Reporting Tools > Transaction Search.
- Search for the finance charge invoice to be reversed (deleted). The last finance charge created for a customer is the only one that can be deleted (a message will display if you attempt to delete and it isn't the last created finance charge).
- Optionally, recalculate finance charges by repeating Step C: Calculate Finance Charges.
Option 2 - Reverse Multiple Finance Charges at Once
This procedure allows you to remove the last posted finance charge and recalculate finance charges. Finance charges that have already been paid will not be included in the recalculation.
- Select Processes > Sales > Calculate Finance Charges.
- Click Recalculate.
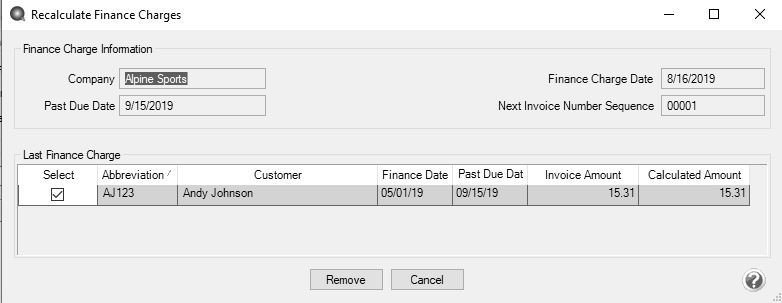
- Verify that all of the customers you want to remove the last posted finance charge for are selected. If you do not want to recalculate a posted finance charge for a customer, clear the Select check box.
- Click Remove.
- At the WARNING! This process will delete the last finance charge transaction for each row selected. Do you want to continue? message, click Yes if you are ready to remove and recalculate all posted finance charges.
- Optionally, recalculate finance charges by repeating Step C: Calculate Finance Charges.
|
Document: 3148 |
|---|