- Bank Reconciliation (Reconcile an Account to a Bank Statement)
Related Help
_24.jpg) Bank Reconciliation Video - Duration: 18 min 53 sec
Bank Reconciliation Video - Duration: 18 min 53 sec
 View or Print as PDF for CenterPoint Accounting
View or Print as PDF for CenterPoint Fund Accounting
View or Print as PDF for CenterPoint Payroll
| Document #: | 3037 | Product: | CenterPoint® |
|---|
Transactions entered in CenterPoint can be reconciled to the bank statement received each month from your bank. The summary will identify if there are differences between your reconciliation and the bank statement balance.
Step A: Select Account to Reconcile
Step B: Enter Fees Charged and Interest Earned (optional step)
Step C: Select Transactions to Reconcile
Step A: Select Account to Reconcile
- Select Processes > Banking > Bank Reconciliation.
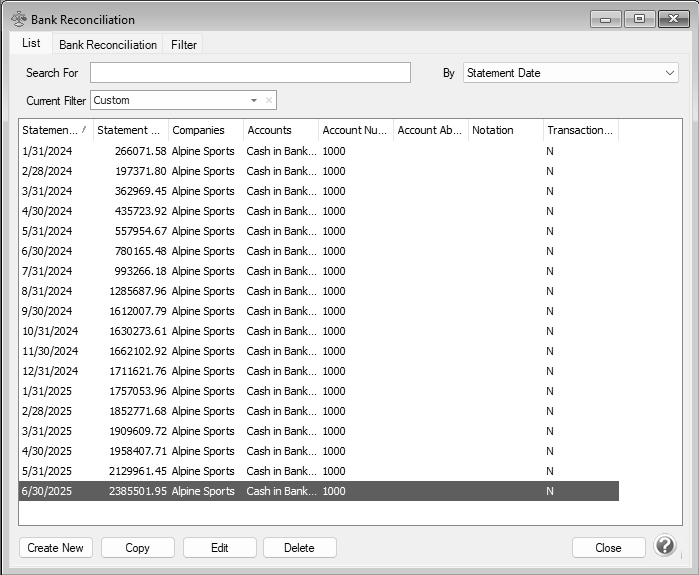
- Click Create New or select an existing bank reconciliation and click Copy. When you copy an existing bank reconciliation, a new reconciliation is created using the same Company and Account selections as the selected bank reconciliation
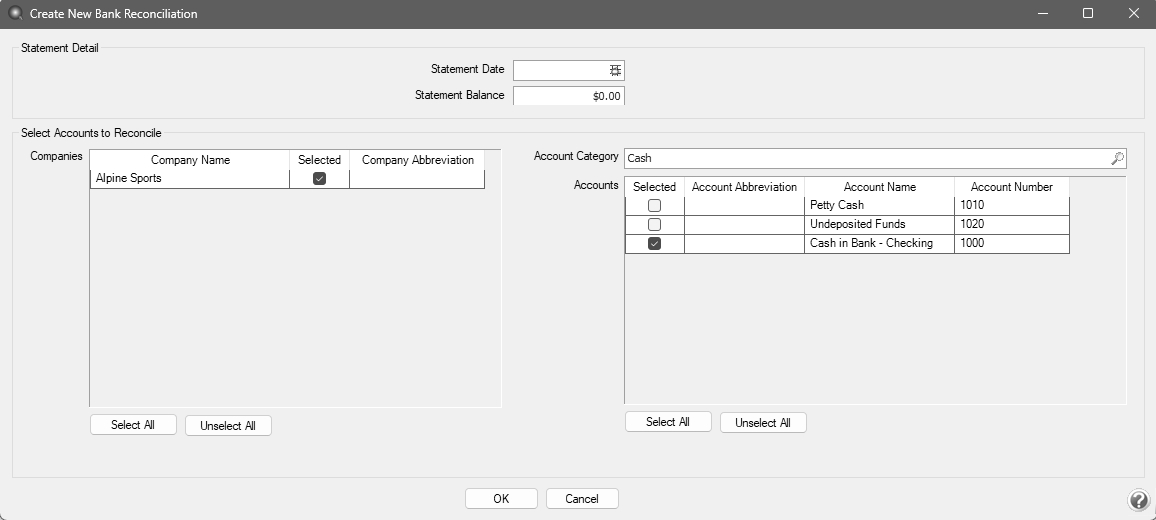
- Enter the bank statement closing date in the Statement Date box.
- In the Statement Balance box, enter the statement closing balance from the bank statement.
- Under Select Accounts to Reconcile, in the Companies/Funds section, select the companies/funds that you want to reconcile. You can select one or more companies/funds. If you have two companies/funds that share one physical bank account, but write checks separately, you have the option of displaying them together to reconcile that bank account. Use the Select All and Unselect All buttons to make selection easier.
- In the Accounts box, select the account(s) that you want to reconcile. Use the Select All and Unselect All buttons to make selection easier. By default cash accounts will be listed. In the Account Category box, the Cash account category will display as the default. If you want to reconcile a different account category, select the category of the accounts that you want to reconcile. The Account Category defines which accounts display in the Accounts field. For example, if you want to reconcile line of credit accounts, select the Line of Credit account category.
Note: To customize the columns shown in the Company or Accounts sections, right-click within the section and select Add/Remove Columns to choose which columns appear and in what order. You can also reorder the columns by right-clicking and selecting Sort Columns. To filter what is displayed, right-click and choose Show Only Active or Show All Companies/Funds or Accounts to limit or expand the view.
- Click OK.
Step B: Enter Fees Charged and Interest Earned (optional step)
- The Fees & Interest tab will be used to enter any bank fees, service charges and interest income that appear on the bank statement. If no fees were charged or interest earned to this account, skip to Step C.
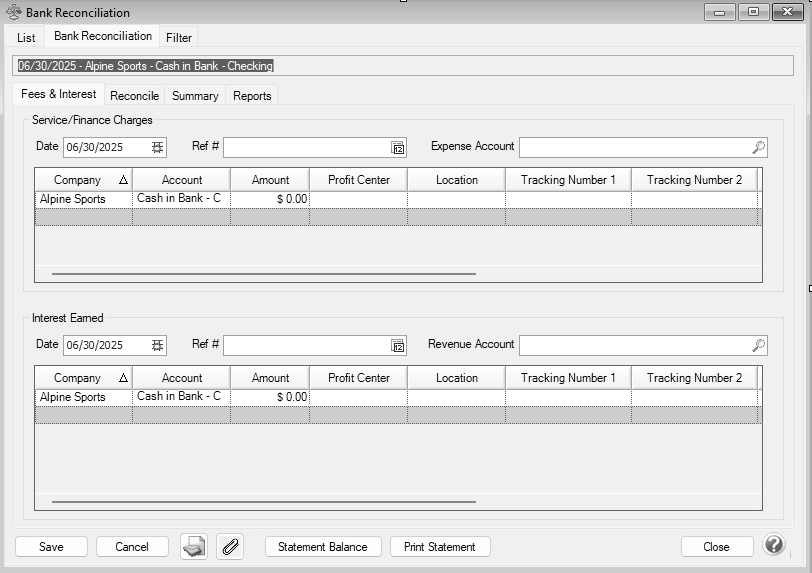
- The Date defaults to the statement date.
- In the Service\Finance Charges section, enter the Ref #, and then select the bank fee or service charge expense account.
- The Company/Fund and Bank Account fields will be filtered to only companies/funds/bank accounts that are included on this bank reconciliation.
- The bank service/finance charges can be distributed to other companies/funds, bank accounts, management details; Profit Center/Department, Production Center/Location, Production Year/Tracking Number 1, Production Series/Tracking Number 2, Project, Associated Account, Distribution, and can be entered onto multiple rows, each with an amount.
- In the Interest Earned section, enter the Ref #, and then select the interest income revenue account.
- The interest earned can be distributed to other companies/funds, bank accounts, management details; Profit Center/Department, Production Center/Location, Production Year/Tracking Number 1, Production Series/Tracking Number 2, Project, Associated Account, Distribution, and can be entered onto multiple rows, each with an amount.
Step C: Select Transactions to Reconcile
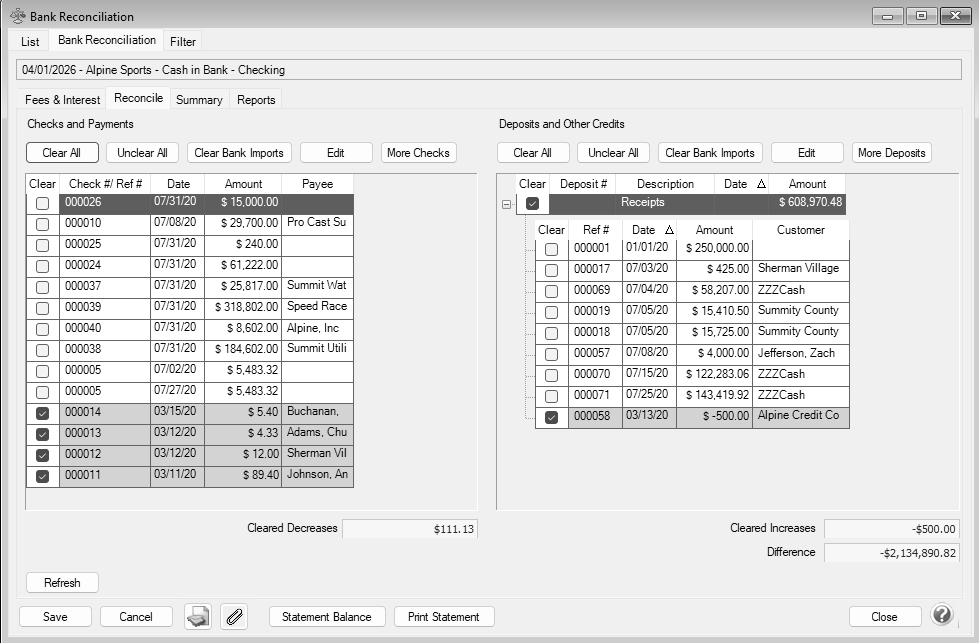
- Select the Reconcile tab. This tab is used to specify which transactions cleared the bank. The left portion of the screen displays non-reconciled checks and payments (ATM transactions, electronic transfers, voided checks, etc.) and transactions imported through Bank Transaction Import automatically selected as Cleared. .
Note: Direct deposit payments from CenterPoint Payroll will display as a single entry per pay run, for example: PR00001 11/17/10 $795.55 Direct Deposits displaying the following information:
- Check #/Ref # = Pay run "Sequence Number" (PR0001).
- Date = Pay run "Pay Date" (11/17/10).
- Amount = Sum of all the direct deposit amounts for the pay run ($795.55).
- Payee = "Direct Deposits".
The right portion of the screen includes all non-reconciled bank deposits and other credits to the account.
Note: ACH payments from CenterPoint will display as a single entry, for example: ACH Payment 05/16/19 $99.15 Direct Deposits displaying the following information:
- Check #/Ref # ACH Payment"
- Date = ACH Transmission Date (05/16/19).
- Amount = Sum of all the transmitted ACH payments ($99.15).
- Payee = "ACH Payments".
The right portion of the screen includes all non-reconciled bank deposits and other credits to the account.
Note: To customize the columns shown in the in the Checks and Payments and Deposits and Other Credits sections, right-click within the section and select Add/Remove Columns to choose which columns appear and in what order. You can also reorder the columns by right-clicking and selecting Sort Columns. A transaction can be viewed/changed by right-clicking and selecting Edit Transactions.
- If most entries in the Checks and Payments columns cleared on this bank statement, click Clear All to select all items. Then remove the check marks on any items that did not clear on this bank statement by clicking or pressing the space bar on the item.Cleared items will display with a grey background and uncleared items will display with a white background (transactions imported through Bank Transaction Import will be selected automatically and display with a green background). Otherwise, use the following methods to select items to clear:
- Single rows: Click or press the space bar on a row, or use Ctrl + click to select multiple individual rows.
- Sequential rows: Use Shift + click to select a range of rows.
- Specific rows: Hold Ctrl and click check boxes to select individual rows out of sequence.
- All selected rows: After selecting multiple rows with Shift or Ctrl, hold Alt and click a check box to apply the action to all selected rows.
- If you changed the Cleared status on any transactions imported through Bank Transactions Import and want to automatically select the transactions again, click Clear Bank Imports.
- Verify that the Cleared Decreases matches the total checks cleared on the bank statement.
- If most entries in the Deposits and Other Credits columns cleared on this bank statement, click Clear All to select all items. Then remove the check marks on any items that did not clear on this bank statements. Cleared items will display with a grey background and uncleared items will display with a white background (transactions imported through Bank Transaction Import will be selected automatically and display with a green background). Receipts with the same deposit number display as a consolidated figure. Click the plus sign to view all receipts included in deposit. General Journal transactions that debit a bank account will display under the Deposits and Other Credits columns. Otherwise, use the following methods to select items to clear:
- Single rows: Click or press the space bar on a row, or use Ctrl + click to select multiple individual rows.
- Sequential rows: Use Shift + click to select a range of rows.
- Specific rows: Hold Ctrl and click check boxes to select individual rows out of sequence.
- All selected rows: After selecting multiple rows with Shift or Ctrl, hold Alt and click a check box to apply the action to all selected rows.
- Verify that the Cleared Increases matches the total deposits cleared on the bank statement.
- If your bank reconciliation balances to your bank statement, the Difference will display $0.00. If the difference is not zero, you will need to review the cleared transaction entries to the bank statement again. Refer to the FAQ section for more information. Click Statement Balance and click OK to change the bank statement ending balance, recalculate the bank reconciliation, and update the Difference to reflect the new statement balance.
- Click on the Reports tab or the Print Statement button to view a variety of Bank Reconciliation reports.
- Click Save.
Step D: Review Summary & Print Reconciliation Report
- The Summary tab outlines the bank reconciliation.
- The statement balance minus outstanding checks plus outstanding deposits should equal the CenterPoint account balance for this account. The Difference box reports an amount if CenterPoint is not balanced to the Bank Statement.
- Enter an optional Notation for this bank reconciliation. The notation will display in the Notation column on the List tab.
- Click on the Reports tab or the Print Statement button to print the Bank Reconciliation report.
Frequently Asked Questions (FAQ)
Q: What should I do if the Difference box on the Reconcile or Summary tab isn't zero when I've finished the reconciliation?
A: If the difference is not zero, then there are
- Transactions in CenterPoint that were marked as cleared and shouldn't have been.
- Transactions in CenterPoint that were not marked as cleared and should have been.
- A transaction that went through the bank at a different amount than was entered in CenterPoint.
Q: What should I do if a transaction went through the bank but it isn't showing in CenterPoint bank reconciliation?
A: Normally this is caused because an incorrect date was used on the transaction in CenterPoint. While in the Reconcile tab there is a More Checks and a More Deposits box that will show you additional transactions that are in the system but have a date after the statement close date. If the missing transaction is listed in the More Checks or More Deposits area, simply right click on the transaction and select Edit Transaction. Edit the date on the transaction so that it falls before the statement closing date and click Save. The transaction will then display on the Reconcile tab.
If the missing transaction is not in the More Checks or More Deposits buttons, you can use Transaction Search (Processes > Transaction Search) to check the following:
- Was the transaction entered in CenterPoint?
- Was the correct bank account used on the transaction?
Q: In the Reconcile tab, can I change the order the transactions are listed?
A: Yes. To change the order, click on the column header. For example, if you prefer to have the Checks and Statements transactions sorted in Date order, simply click on the Date header.
Q: How should I exit Bank Reconciliation if I need to stop but it's not complete?
A: Click on Save. When you are ready to continue working on the bank reconciliation, click on Processes > Banking > Bank Reconciliation. Select Reconciled Statement and the original Statement Date. Then click on the Reconcile tab to continue the process.
Q: Can I view a previously saved Bank Reconciliation?
A: Yes. Click on Processes > Banking > Bank Reconciliation. After selecting the appropriate
Q: If a transaction is listed in bank reconciliation but it's incorrect, can it be corrected?
A: Yes. While in the Reconcile tab, select the transaction and click Edit (or Right-click on the transaction and click Edit). The transaction will display in the original transaction entry screen. Make the necessary changes and then click Save. An optional Transactions Removed column can be added to the Bank Reconciliation List tab that will allow you to determine if any transactions in the reconciled statement have been edited and therefore removed from the reconciliation statement which would indicate the statement needs to be balanced and saved again.
Q: The Transactions Removed column on the Processes > Bank Reconciliation > List tab displays with a Y for a completed bank reconciliation with cleared transactions and a difference of zero, why?
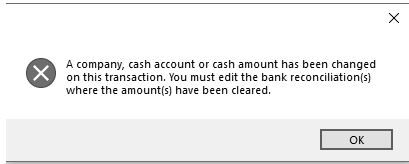
A: If a bank reconciliation with cleared transactions and a difference of zero contains a transaction that was edited (even if it was just a date change), deleted, or voided, the Transactions Removed column will display a Y to identify that a transaction was changed. If a cleared transaction is changed through Transaction Search, the following message displays to identify that the transaction was already cleared and the bank reconciliation should also be changed.
Q: There are zero dollar transactions in yellow on the Reconcile screen. What are these and what should I do with them?
A: They are voided checks. You should mark them as cleared.
Q: There are transactions listed, but the Clear box is not active, why?
A: These transactions are already cleared on another reconciliation with a later date. They display here because they are uncleared as of this statement date. The Clear box is not enabled because the same transaction cannot be cleared twice.
Q: What happens when a bank reconciliation is deleted?
A: Deleting a bank reconciliation would remove the bank reconciliation for that date from the system. Any transactions that were cleared would no longer show as cleared and any fees or interest added would be reversed. It would allow you to start over with reconciliation for that statement.
|
Document: 3037 |
|---|