CenterPoint® Accounting for Agriculture
- Back Up or Restore File Repository
Related Help
_24.jpg) Back Up Video - Duration: 6 min 56 sec
Back Up Video - Duration: 6 min 56 sec
Restore Video - Duration: 2 min 46 sec

_24.png) Back Up or Restore a Single User Database
Document
Back Up or Restore a Single User Database
Document
Back Up or Restore Aatrix History
| Document #: | 3444 | Product: | CenterPoint® |
|---|
Use this procedure to back up attachments in your File Repository (when the File > Preferences > General > File Attachments preference is set to store attachments in a File Repository rather than the database.) onto a hard drive, zip drive, flash drive, etc.
To copy the backed up files to the file repository, use the Restore feature at the end of this topic.
Back Up File Repository
- Select File > Backup > Backup File Repository.
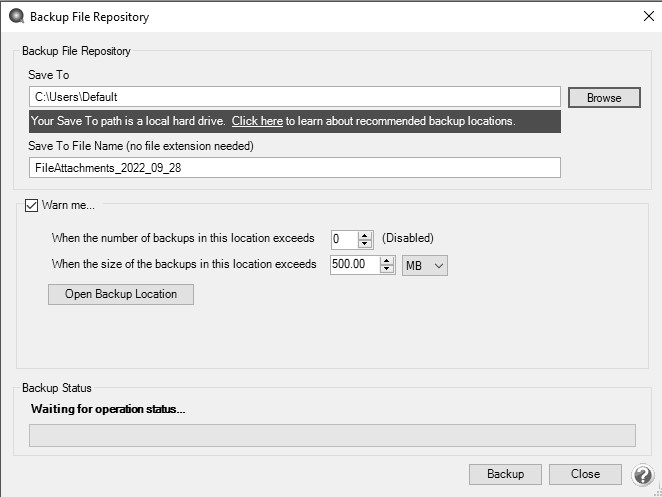
- In the Save To box, a default path displays. Click Browse, select the location on your own computer to save the backup file, and then click Select Folder. Once you select the path to back up to, the last path used for backing up will automatically display each time you back up.
Note: If you want to create a new folder to back up to, click New Folder , enter a name for the folder, and then click Select Folder to back up to the new folder.

- To back up to your own computer, select a location on the C:\ drive. The local C:\ drive is not the recommended backup location and a message will display with a link describing the preferred backup locations: To ensure continued accessibility to your data in the event of a hard drive failure, Red Wing Software recommends that backups are saved to removable, network, or off-site storage.
- To back up to a server or remote computer, select a location on the network drive (for example, f:\ or g:\, etc.).
- To back up to a flash (thumb) drive, select the drive letter that was assigned to the drive when it was inserted into the usb port on the computer.
- The Save To File Name file will default to FileAttachments_YYYY_MM_DD.frz.
- If you want to be warned when the Save To backup location you are storing backups to exceeds a specified number of files or amount of space, leave the WarnMe check box selected. When the check box is selected, and then specify the conditions about when you want to be warned:
- In the When the number of backups in this location exceed box, enter a number between 0 - 99.
- In the When the size of the backups in this location exceeds box, enter a number between 0.00- 999.99 and select either MB (megabyte) or GB (gigabyte)
- Setting either value to 0 disables that specific warning. For example, setting the When the number of backups in this location exceed box to zero will not warn you about the number of backups, but you will continue to be warned about the size of the backups according to your When the size of the backups in this location exceeds setting.
- To view the contents of the Save To backup location, click Open Backup Location.
- Click Backup.
Restore File Repository
- Select File > Restore > Restore File Repository.
- In the Backup File to Restore box, click Browse, and then select the file you want to restore. Click Browse to locate the backup file (for example, from a CD or another hard drive). The file name for the backup file is "FileAttachments_YYYY_MM_DD".
- Click Restore.
- The contents of the file repository location may be overwritten during the restore process. Are you sure you want to continue? message, click Yes.
- At the Restore Completed Successfully message, click OK.
|
Document: 3444 |
|---|