CenterPoint® Accounting
- Fill/Ship Sales Orders
Related Help
_24.jpg) Enter a Sales Order or Quote Video - Duration: 22 min 12 sec
Enter a Sales Order or Quote Video - Duration: 22 min 12 sec
Sales Order Quick Entry Video - Duration: 15 min 14 sec
Convert a Quote to a Sales Order Video- Duration: 9 min 52 sec
Fill and Unfill Sales Orders Video - Duration: 13 min 12 sec
Invoice Filled Sales Orders Video - Duration: 15 min 18 sec
Print or Email Sales Orders Video - Duration: 11 min 55 sec

Sales orders are entered when a customer commits to purchasing goods/services. When the item is delivered (shipped, picked up, etc.), the order needs to be filled so that the quantities can be deducted from inventory and the customer invoiced for the sale. Filling an order simply means that a shipped quantity has been placed on the order. Orders can be filled a number of ways::
Option B: Manually Fill a Single Order
Option C: Manually Select Multiple Orders to be Filled at the Same Time
Option D: Use Filters to Select Multiple Orders to be Filled at the Same Time
Option A: Fill a Single Order
Prior to using the Fill Single Order process, select File > Preferences > Sales Orders > General and choose the criteria the system should use when the Fill Single Order button is used.
- Select Processes > Sales > Sales Orders (Edit/Fill/Invoice).
- Highlight the order to be filled and click Fill Single Order.
- The order will be displayed and the Quantity Shipped fields will be auto-filled based on the option selected in the Preference mentioned above. If a serialized or lotted item is included on the order, click on the Lot/Serial Number detail button and select the lot or serial numbers that were provided to this customer.
- Make any needed changes.
- If you want to reorder the lines you entered on the transaction in a particular order, include the Line Sequence column in your data entry grid. Each line will automatically be assigned a line sequence number. The first line is assigned 10, the second 20, and so on. To reorder the lines, change the sequence number to the order in which you want the lines to print or display. For example, if you want the second line to print before the first line, change the line sequence to be 5, 6, 7, 8 or 9. To view the reordered lines, click Options, and then select Refresh.
- Click Save.
- Click Create Invoice and complete the Post & Print screen, and then click Create.
- Click OK.
- The Status on the order will automatically change to Filled or Partial Fill depending on if all or just some of the items were shipped.
Option B: Manually Fill a Single Order
- Select Processes > Sales > Sales Orders (Edit/Fill/Invoice).
- Highlight the order to be filled and click Edit.
- The order will be displayed and the Quantity Shipped fields will be zero. Enter the appropriate Quantity Shipped for each item. If a serialized or lotted item is included on the order, click on the Lot/Serial Number detail button and select the lot or serial numbers that were provided to this customer.
- Make any needed changes.
- Click Create Invoices and complete the Post & Print screen, and then click Create
- Click OK.
- The Status on the order will automatically change to Filled or Partial Fill depending on if all or just some of the items were shipped
Option C: Manually Select Multiple Orders to be Filled at the Same Time
- Select Processes > Sales > Sales Orders (Edit/Fill/Invoice).
- Single-click on the first order to be filled. Then while holding down the Ctrl key on the keyboard, click on each additional order to be filled.
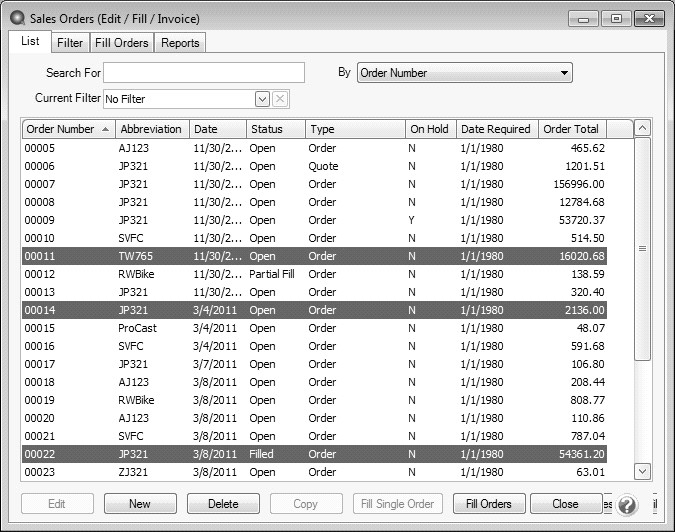
- Once all orders to be filled are highlighted, click on Fill Orders.
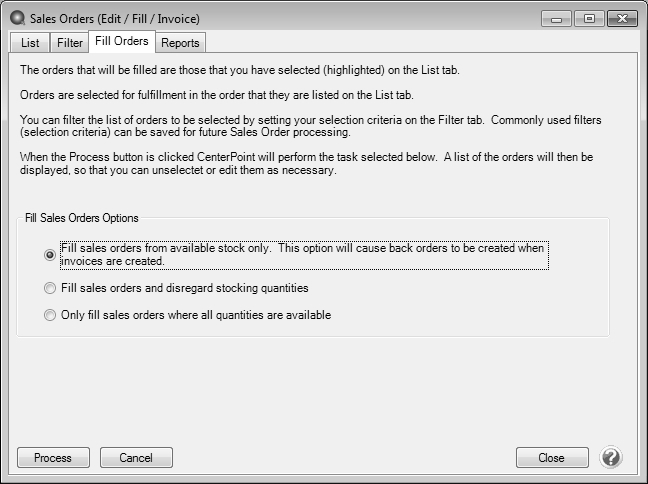
- Select the appropriate Fill Sales Orders Option.
- Fill sales orders from available stock only: Each highlighted order will be filled. Inventory items will be filled only to the extent that there are quantities on hand. Service and Non-inventory items will be filled in full. The items not filled will be placed on a back order.
- Fill sales orders and disregard stocking quantities: All items on all selected orders will be filled, even if there is not enough inventory on hand.
- Only fill sales orders where all quantities are available: Only those orders where there is enough inventory to fill all items in full will be filled.
- Click Process and Yes to continue.
- Those orders that were filled will be displayed in the Filled Sales Orders screen. Those orders that could not be filled or partially filled (because of the Fill Sales Orders Option selected) will not be included. The Status will specify if the order was completely or partially filled. To review the details of what was filled on a specific order, click on it and click Edit.
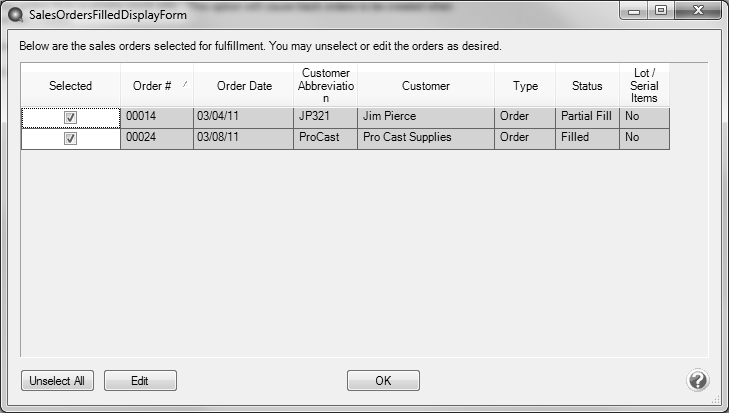
- If the Lot/Serial Items column displays Yes for any order, you must Edit that order and specify the lot or serial numbers used for this order. Once the order is displayed with the Edit button, click on the Lot/Serial Number detail button.
- Click OK to complete the fill process.
Note: To unfill an order at this point, unselect the Selected box.
- Click Create Invoices and complete the Post & Print screen, and then click Create.
- Click OK.
Option D: Use Filters to Select Multiple Orders to be Filled at the Same Time
Using Filters allows you to select multiple orders to be filled based on criteria that you have provided. For example, select all orders dated a certain day or all orders that are required by the customer next week.
- Select Processes > Sales > Sales Orders (Edit/Fill/Invoice).
- Click on the Filter tab.
- Select the criteria to be used from the left side of the screen, (for example, Date Required) and then specify the filter criteria information on the right side of the screen.
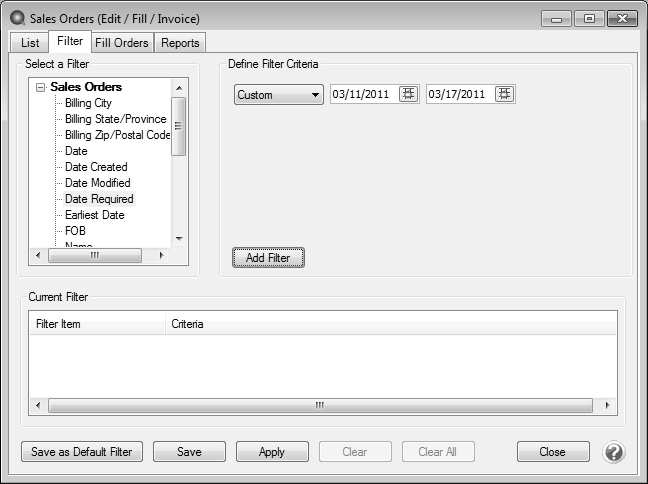
- Click Add Filter.
- Repeat steps 3 and 4 if additional criteria is needed.
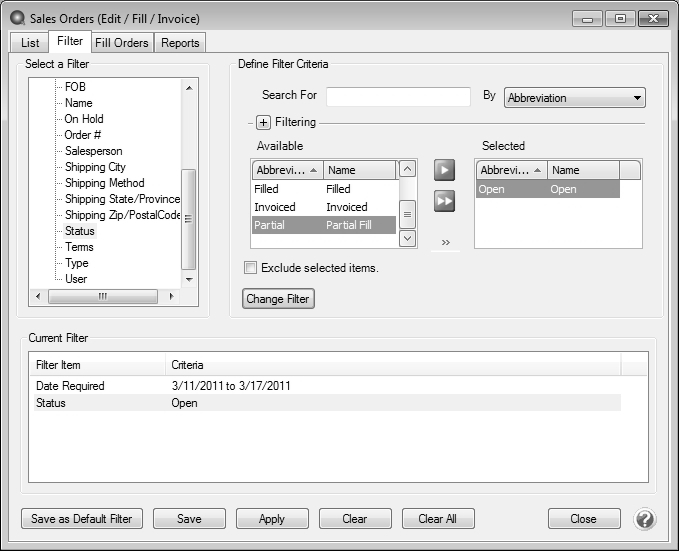
- If this is criteria that you will be using again in the future to fill orders, then click Save to save this as a new filter. Otherwise, click Apply.
- The List tab will now display only those orders that meet the criteria specified on the Filter tab. Single-click on the first order, hold the shift key down (on the keyboard), and then click on the last order to highlight all of the orders.
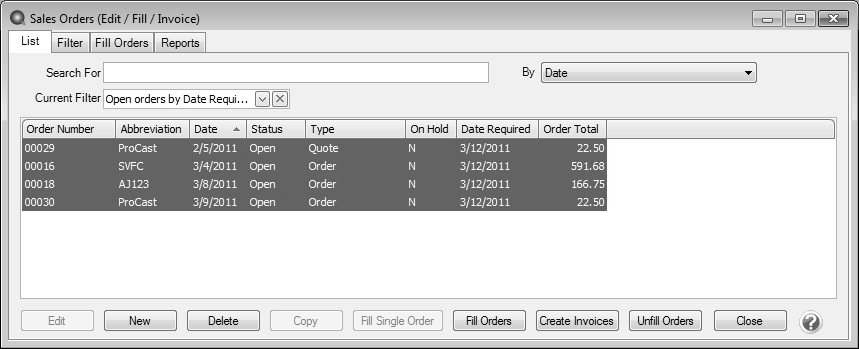
- Click on Fill Orders.
- Select the appropriate Fill Sales Orders Option.
- Click Process in the Filled Orders screen and then Yes to continue.
- Click Create Invoices and complete the Post & Print screen, and then click Create.
- Click OK to complete the fill process. At the main Sales Orders (Edit/Fill/Invoice) screen, use the Current Filter field to switch back to all orders (or all open orders).
|
Document: 3176 |
|---|