CenterPoint® Accounting
- Report Selections and Selection Criteria
If no formatting changes are needed on a report, and if an extensive filter does not need to be selected, a user can quickly launch a report by selecting the report, reviewing the Report Selections and clicking Print or Preview.
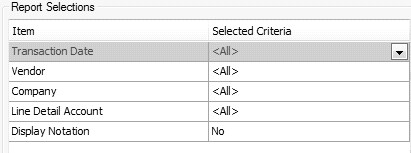
- One of the common report selections is the Date Range, Period, or Period Range:
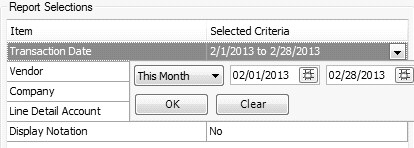
- For example, This Month or This Quarter. When selected the report will be produced based on the date you enter and the date range selected. For example, if the report is set for This Month and the current system date is 5/15/13, then the report will print for 5/1/13 - 5/31/13.
- Other Date Range and Period Range selections include:
- This YTD - When you generate the report batch, the reports will be produced from January 1 of the current system year unless that period is not yet opened and then it is January 1 of the last opened year and through the current system date or current system period unless that period is not open and then it is the last opened period.
- Last YTD - When you generate the report batch, the reports will be produced from January 1 of the current system year minus one year unless that period is not yet opened and then it is January 1 of the last opened year through the current system date or period minus one year unless that period is not open and then it is the last opened period.
- This Fiscal Year YTD - When you generate the report batch, the reports will be produced from the Date Settings preference for the fiscal year end month plus one month of the current system year unless that period is not yet opened and then it is the first period of the last opened year through the current system date or period unless that period is not open and then it is the last opened period.
- Last Fiscal Year YTD - When you generate the report batch, the reports will be produced from the Date Settings preference for the fiscal year end month plus one month minus one year of the current system year unless that period is not yet opened and then it is the first period of the last opened year through the current system date or period minus one year unless that period is not open and then it is the last opened period.
To change/limit and order the pre-defined date selections in the Date Range, Period and Period Range report selection filters:
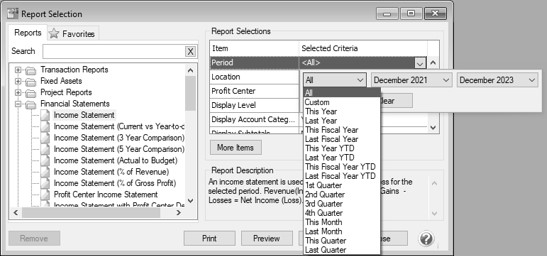
- Select the report you want to print/preview. In the example below, the Income Statement report was selected.
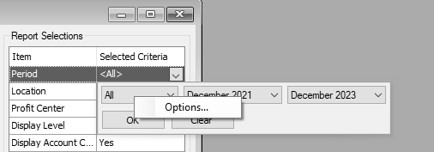
- Under Report Selections, select the date/period selection you want to customize. In the example below, Period was selected.
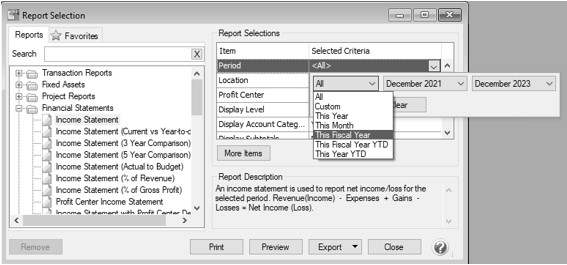
- Under Selected Criteria, click the drop-down arrow that contains the range selection to display the current pre-defined date selections.
- Right-click on the drop-down box that contains the All selection, and then select Options.
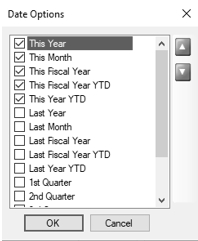
- From the Date Options screen, select the ranges that apply to you. The ranges can be ordered by using the green up/down arrows. Click OK. Once changes are made, they will be saved and re-used anywhere the report filter is used. Each type of filter (Date Range, Period, and Period Range) maintains its own configuration settings.
- Click the drop-down arrow that contains the All selection to display the customized/limited date selections..
To define specific information you want to view or print a report by, select a Report Selection, define the specific information, and then click Print or Preview. For example, if you wanted to print the Customer List report for one specific customer, under Report Selections, select Customer. Note: You can select up to 500 items to filter the report by for each option.
On the displayed screen, you can:
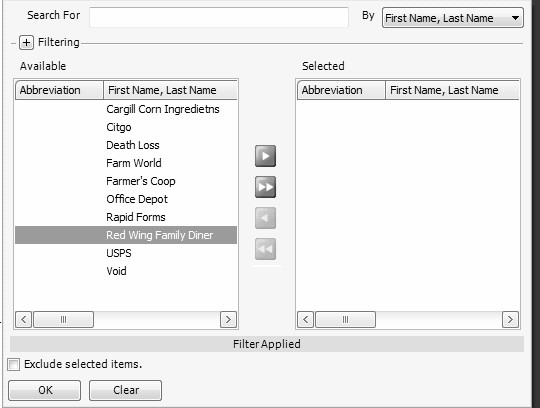
- Find all customers that have Red Wing in the name.
- In the By box, select which column you want to search for a specific record in the list. For example, you want to search for First Name, Last Name, so you would select the First Name, Last Name column .
- In the Search box, enter the name you are searching for, for example Red.
- The first name that starts with Red is highlighted in the Available list, followed by all of the other names with Red. Move the Name to the Selected List by clicking
. To select multiple criteria in the Available List, hold the CTRL key while making the selections and then to move your selections to the Selected List, click
.
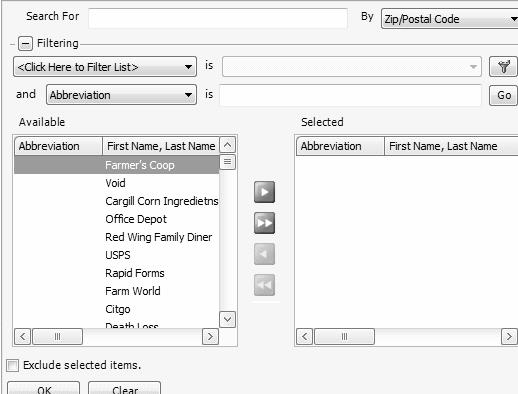
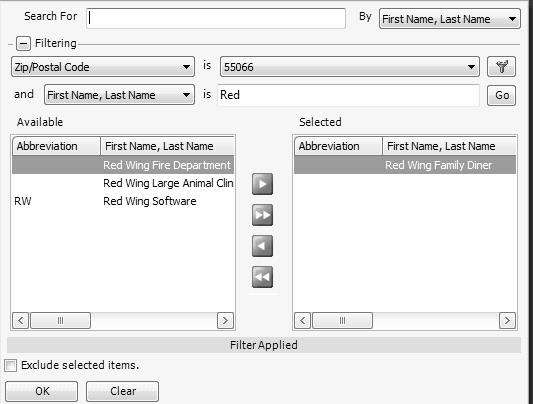
- Display only customers that have Red in the name in a specific Zip Code.
- Click
 , click Click Here to Filter List, and then select Zip/Postal Code. Then, in the next box, click the drop-down arrow and select Store.
 - In the box next to and, select First Name, Last Name. Then, in the next box, enter Red and then click Go.
If a filter is not available for a list, you can define a custom filter by clicking  , clicking
  ,assigning a name, clicking OK, defining the filter criteria, and then clicking Save. The filter will automatically display in the list of filters and applied.
Example - Using Report Selections and Selection Criteria for the Customer List report
Select Reports > Reports. The Reports tab displays the types of available reports. The plus and minus signs at the left expand and collapse the report hierarchy.
- Expand Setup Lists with a double-click or click the (+) sign.
- ExpandCustomerswith a double-click or click the (+) sign.
- Click the Customer Listreport.
- Under the Report Selections column, select Customer.Select the customer or customers you wish to view. If you want to reset your selections back to the default, click Clear.
- Under the Report Selections column, select Display Notes.
- Select Yes to display notes on the Customer List report or click No to remove notes from the Customer List report.
- If you want to view the report by any other report selections, click More Items, select the report selection, click OK, under Report Selections, select the report selection, and then define any specific criteria.
- Click Preview.
- Reports can be printed from the Preview screen by clicking the Printer icon or by clicking Print on the Report Selections screen.