CenterPoint® Accounting
- Mass Update Names, Vendors, or Customers
Related Help
_24.jpg) Names Maintenance - Duration: 21 min 16 sec
Names Maintenance - Duration: 21 min 16 sec
Name, Customers, and Vendors Mass Update - Duration: 4 min 25 sec
 View or Print as PDF for CenterPoint Accounting for Agriculture
View or Print as PDF for CenterPoint Accounting
The mass update process can be used to update more than one name, vendor, or customer at the same time. You can mass update various types of information, including accounts, payment terms, printing/publishing options, etc.
Note: We recommend you do a backup of your database prior to starting the mass update process.
Mass Update Names, Vendors, or Customers
- Select Setup > Names, Vendors or Customers.
- From the List tab, select the names, vendors, or customers you want to update. Multiple names can be selecting by pressing the CTRL key while you make your selections. If you do not limit your list to selected names, all names will be included in the update.
- Click Mass Update. The Mass Update Wizard window will open. The wizard will guide you through the process. Click Next.
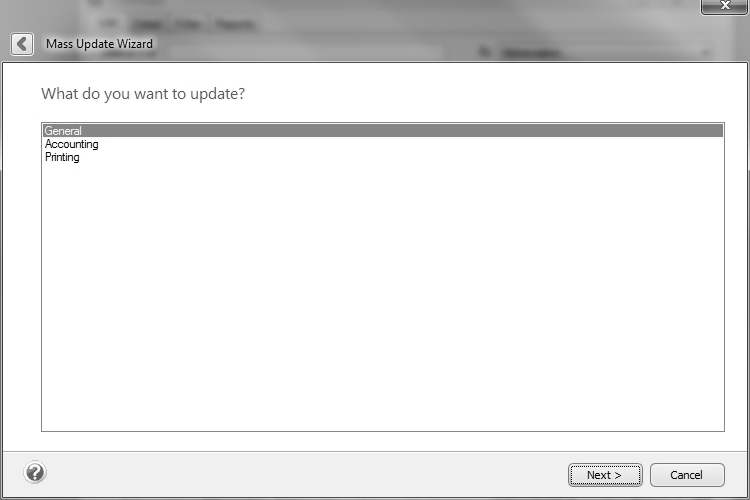
- Select the type of item you'd like to change and click Next. The choices listed correspond with different tabs and buttons in the Names, Vendors, or Customers screens.
- Depending on the selection you made in step 5, screens will be displayed asking you to make other selections.
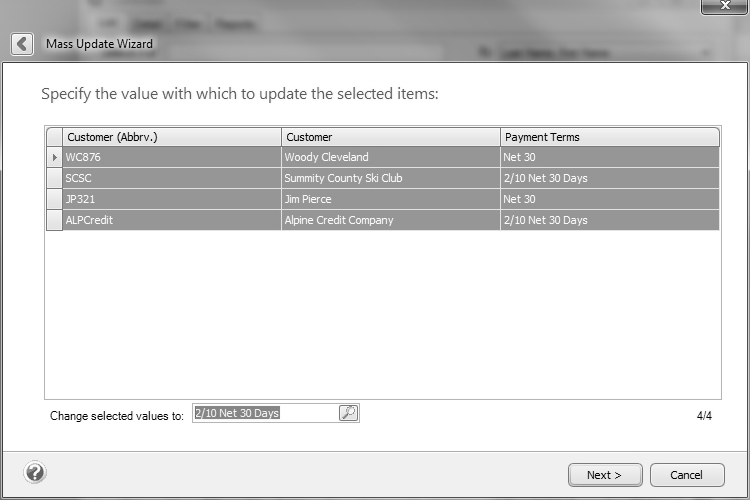
- A list of all customers or vendors that have the specified information assigned will be displayed. Specify the value with which to update the selected items. For example, if you chose Payment Terms, specify the terms you'd like assigned to each of the selected vendors. Click Next.
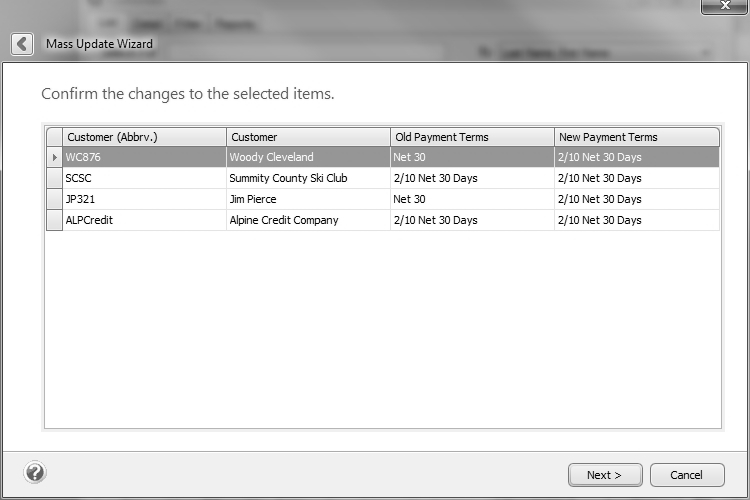
- Verify the information that will be changed and click Next.
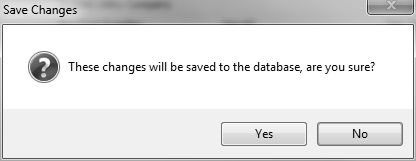
- At the These changes will be saved to the database, are you sure? message, click Yes to finalize the changes.
- Click Finish to exit, click the Back button to perform a similar update, or click New to start a new update.
|
Document: 3210 |
|---|