CenterPoint® Accounting
- Exporting Data to an External Application
Related Help

CenterPoint has a number of export files available that can be used for sending data to external applications. For example, data from payroll can be exported into a file that is then sent to a 401k plan provider. Basic exports are included as part of the standard application. Custom exports can be developed specifically for your needs. Contact the Red Wing Software sales team to discuss purchasing a custom export program developed specifically for your business.
Once a custom export program is purchased, Red Wing Software will deliver it as an attachment to an e-mail. If e-mailing the file is not an option, you will need to make other arrangements with your salesperson. The details below will identify the step-by-step instructions a customer will follow to setup and use the custom export.
Step A - Save the E-mailed Custom Export Program File (one-time setup)
Step B - Setup the Custom Exports Preference (one-time setup)
Step A - Save the E-mailed Custom Export Program File (one-time setup)
- Open the e-mail received from Red Wing Software (with the custom program file attached).
- Save the attachment to your computer or network. For example, in Microsoft Outlook, you would select File > Save Attachment and then specify the location to save the file. The file can be sav`ed to any location, but be sure to note exactly where it was saved to. The process you will use to save the attachment depends on the software you are using for e-mail. Contact the person who setup your e-mail for step-by-step instructions to save a file attached to an e-mail.
Step B - Setup the Custom Exports Preference (one-time setup)
- Select File > Preferences.
- Select Reports and then General.
- Select the Application tab.
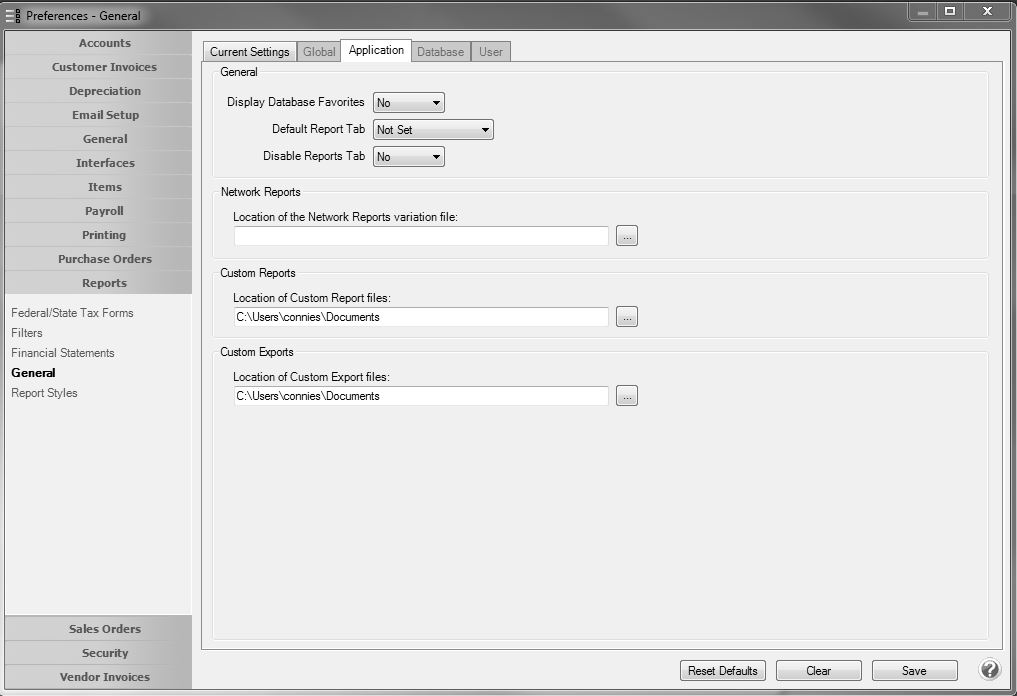
- In the Location of Custom Export Files box, specify the path where you saved the custom export file in Step A.
- If you are on a network and multiple people will be using the export from their workstation, then repeat step B at each workstation.
- Close and restart CenterPoint.
Step C - Export Data Using the New Custom Export Program
- Select File > Exports.
- Select the Exports tab
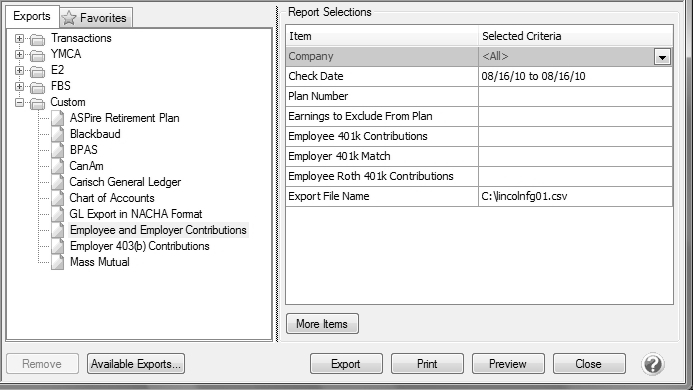
- A list of exports will be displayed. Click on the + next to Custom. Your custom option will be listed.
- Select your custom export.
- Specify the Report Selections created specifically for this export.
- Select Export to create the file.
Note: Preview or Print can also be selected to review the data being exported.
|
Document: 3133 |
|---|