CenterPoint Accounting
- CenterPoint Employee Portal Setup
| Document #: | 3407 | Product: | CenterPoint Payroll® |
|---|
The CenterPoint Employee Portal allows employees convenient online access to view and modify payroll information.
- Payroll information, company announcements, or other information, can be added to the Home section and edited at any time by the payroll administrator, making it easier for employees to stay up to date on important company information.
- The CenterPoint Employee Portal consolidates all the Red Wing Software payroll web services into one spot. Employees can open and launch CenterPoint Time Clock and CenterPoint Pay Advices directly, making access to those services seamless.
- Employees can view and update their personal information (name, address, phone, and email), Federal and State Withholding, and direct deposit allocation information from the Self-Serve section. Before creating a new pay run or updating employee setup, the payroll administrator is notified of any pending changes and can either approve or deny them. This makes payroll communication between employees and payroll administrators very efficient.
- On the Quick Links section, payroll administrators can create useful links for employees to any external web site or file. Use this section to communicate company policies or for providing benefit information such as health and dental insurance, flexible spending, IRS, 401K, etc.
- Add the CenterPoint Employee Portal Module
- CenterPoint Employee Portal Settings
- Registering for the Employee Portal for Administrators
- Maintain Announcements
- Maintain Quick Links
- Notify Employees with Portal Registration Information
- Employee Portal Pending Changes
- Additional Documentation
Note: The CenterPoint Employee Portal is not compatible with the legacy Microsoft® Internet Explorer browser which Microsoft will be retiring on June 15, 2022.
Prerequisite: To use the CenterPoint Employee Portal, you must first subscribe to the CenterPoint Employee Portal service by contacting the Red Wing Software Sales department.
Step 1. Add the CenterPoint Employee Portal Module
- If CenterPoint is not open, start CenterPoint by double-clicking your CenterPoint icon on your desktop.
- Select File > Administration > Module Configuration Manager.
- Select CenterPoint Employee Portal and then click OK twice.
- Close CenterPoint, double-click the CenterPoint icon on your desktop to restart it, and then open your database.
Step 2. CenterPoint Employee Portal Settings
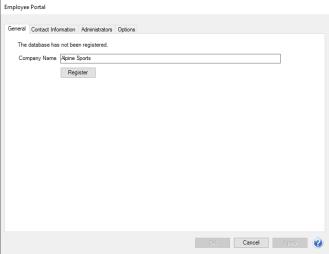
- Select Setup > Payroll Details > Employee Portal Settings.
-
On the General tab, click Register and wait while the Employee Portal registration and synchronization takes place. When it is complete, a Registered Company Code will display. Take note of the Registered Company Code. The Registered Company Code is used when your employees register for the CenterPoint Employee Portal.
-
Select the Contact Information tab.

-
In the Contact Name and Contact Email boxes, enter the information that should be used in email notifications to your employees on your behalf.
-
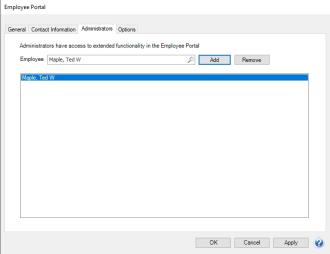
Select the Administrators tab.
-
Select the Employee(s) that have access to enhanced functionality in the Employee Portal, and then click Add. To remove an administrator, select the employee in the list and then click Remove.
-
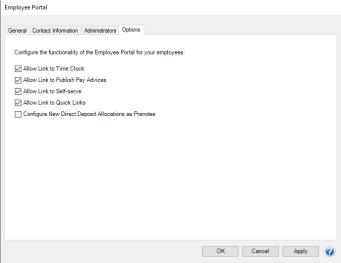
Select the Options tab.
-
Select the options you want your employees to have access to in the Employee Portal:
- Time Clock and Publish Pay Advices - Select the CenterPoint web services your company uses so your employees have a direct link to the service from the Employee Portal.
- Self-Serve - Select this option if you want your employees to be able to update their personal and federal/state withholding or direct deposit allocations. Before creating a new pay run or updating employee setup, you are notified of any pending changes and can either approve or deny them.
- Quick Links - Select this option if you want to be able to provide useful links for employees to any external web site or file. This section can be used to communicate company policies or for providing benefit information such as health and dental insurance, flexible spending, IRS, 401K, etc.
-
Click OK.
Step 3: Registering for the Employee Portal for Administrators
After the CenterPoint Employee Portal is setup is complete, your administrators will need to register for the CenterPoint Employee Portal. The Payroll Administrator will need to provide them with the Company Code (located in Setup > Payroll Details > Employee Portal Settings > General tab) and their Employee Abbreviation.
- From a web browser, enter https://employeeportal.redwingsoftware.com.
- Click Log In.
- Click Create One! to create an identity.
- Enter your First Name and Last Name.
- Enter an Email address and a Confirm Email address.
- Enter a Password and Confirm Password. Passwords must be at least six characters and no longer than 25 characters, include one numerical character and one lower case letter.
- Click Create. This will send an email to the address you entered above.
- Check the email address you provided above for an email from Red Wing Software.
Note: If the email is not received, please look in your Junk email folder.
- Click the here link in the email.
- From your web browser, click the CenterPoint Employee Portal tab or return to https://employeeportal.redwingsoftware.com.
- Click Proceed.
- Enter the Company Code provided to you by your Payroll Administrator.
- Enter your Employee Code (this is the employee Abbreviation used in CenterPoint Payroll located in Setup > Employees).
- Click Submit. If you were not previously enrolled with CenterPoint Time Clock or Publish Pay Advices and you completed Step 1-15, a confirmation email will be sent from CenterPoint Employee Portal to the email address you provided during registration.
Note: If the email is not received, please look in your Junk email folder.
Step 4: Maintain Announcements
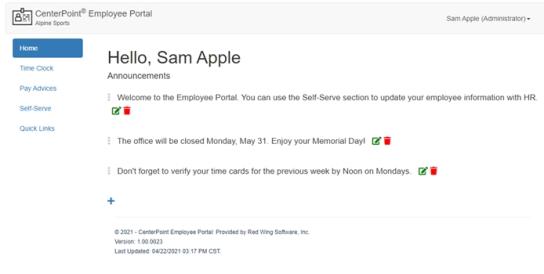
Announcements can be maintained only when an employee that was designated as an Administrator is logged into the Employee Portal.
- Start the CenterPoint Employee Portal.
-
From the left side of the screen, select Home.. To create an announcement, click the plus sign
 at the bottom of the screen.
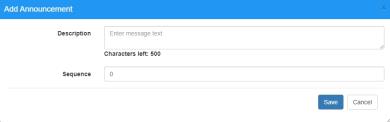
- In the Description box, enter up to 500 characters of text for the announcement.
- In the Sequence box, enter a number that will determine the order of the announcements that display on the Announcements list.
-
To edit an Announcement select the link, click the
 icon, and then make your changes on the Edit Announcements screen. To delete an Announcement, select the announcement, click the
  icon, and at the Are you sure you want to delete the announcement? message, click Yes.
Step 5: Maintain Quick Links
Quick Links can be maintained only when an employee that was designated as an Administrator is logged into the Employee Portal.
- Start the CenterPoint Employee Portal.
-
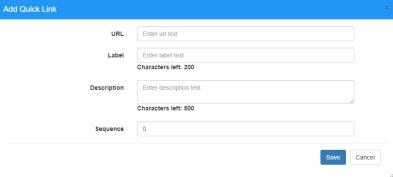
To add a Quick Link, from the left side of the screen, select Quick Links. To create a link, click the plus sign at the bottom of the screen.
-
Enter the URL, Label, and Description for the web site you want to link to.
-
In the Sequence box, enter a number that will determine the order of the links that display on the Quick Links list.

-
To edit a Quick Link, select the link, click the
icon, and then make your changes on the Edit Quick Link screen. To delete a Quick Link, select the link, click the icon, and at the Are you sure you want to delete the link? message, click Yes.
Step 6: Notify Employees with Portal Registration Information
Provide your employees with your Company Code and their EmployeeCode and have them follow the instructions on the Employee Quick Reference for the CenterPoint Employee Portal to register on the CenterPoint Employee Portal.
Step 7: Viewing/Accepting Employee Portal Pending Changes
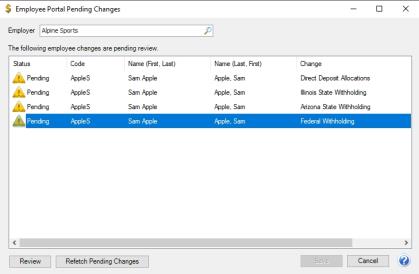
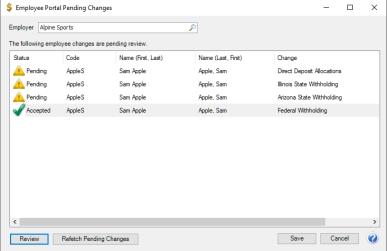
When employees make changes to their personal or Federal/State withholding information or direct deposit allocations, the pending changes will display in the Employee Portal Pending Changes screen in CenterPoint Payroll for approval or denial by a payroll administrator. A message will also be displayed as a warning that pending changes exist before creating a new pay run or updating employee setup.
-
To view pending changes made by your employees in the Self-Serve section of the Employee portal, select Setup > Payroll Details > Employee Portal Pending Changes or from the There are changes pending for review from the Employee Portal. Would you like to process those changes now? message displayed when processing a payroll or employee setup.
-
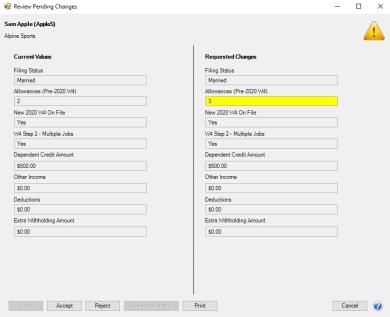
Select the pending changes you want to review, and then click Review. The pending change will be displayed highlighted in yellow. This example will be for the Federal Withholding pending change.
-
To process pending changes:
-
Click Accept. When the change is accepted, a green check mark will display on the Employee Portal Pending changes screen.
-
OR
-
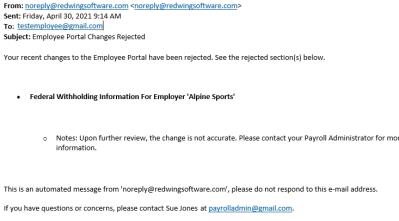
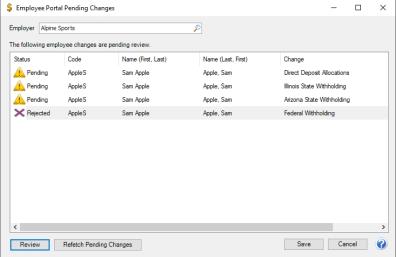
Click Reject to reject the pending change and add Rejection Notes. When a change is rejected, an email will be sent to the employee with the information you entered in the Rejection Notes screen and a red x will display on the Employee Portal Pending changes screen.
-
Accepted/rejected changes can be reviewed and the status can be changed until you click Save.
-
Click Save. Approved changes will be saved to CenterPoint Payroll and rejected changes will be removed. Anything still Pending will remain available to review later.
Step 8: Additional Documentation
- Available Documentation: The following documentation is available and can be distributed to your employees. Click the link below to view the documentation.
- Employee Quick Reference for the CenterPoint Employee Portal – This document contains concise information about using the CenterPoint Employee Portal.